DOMOS7 WebUI
The DOMOS7 WebUI allows you to configure all necessary settings of your appliance and perform system maintenance tasks.
The DOMOS7 documentation contains information for the products ARP-GUARD, Qiata, and meloki.
Sections that are specific to a particular product are clearly marked accordingly.
Login
Virtual Machine
Replace IP-OF-YOUR-APPLIANCE with the IP address assigned to your virtual machine. If you are unsure, check your hypervisor or DHCP server. Your browser may display a security warning due to a self-signed certificate.
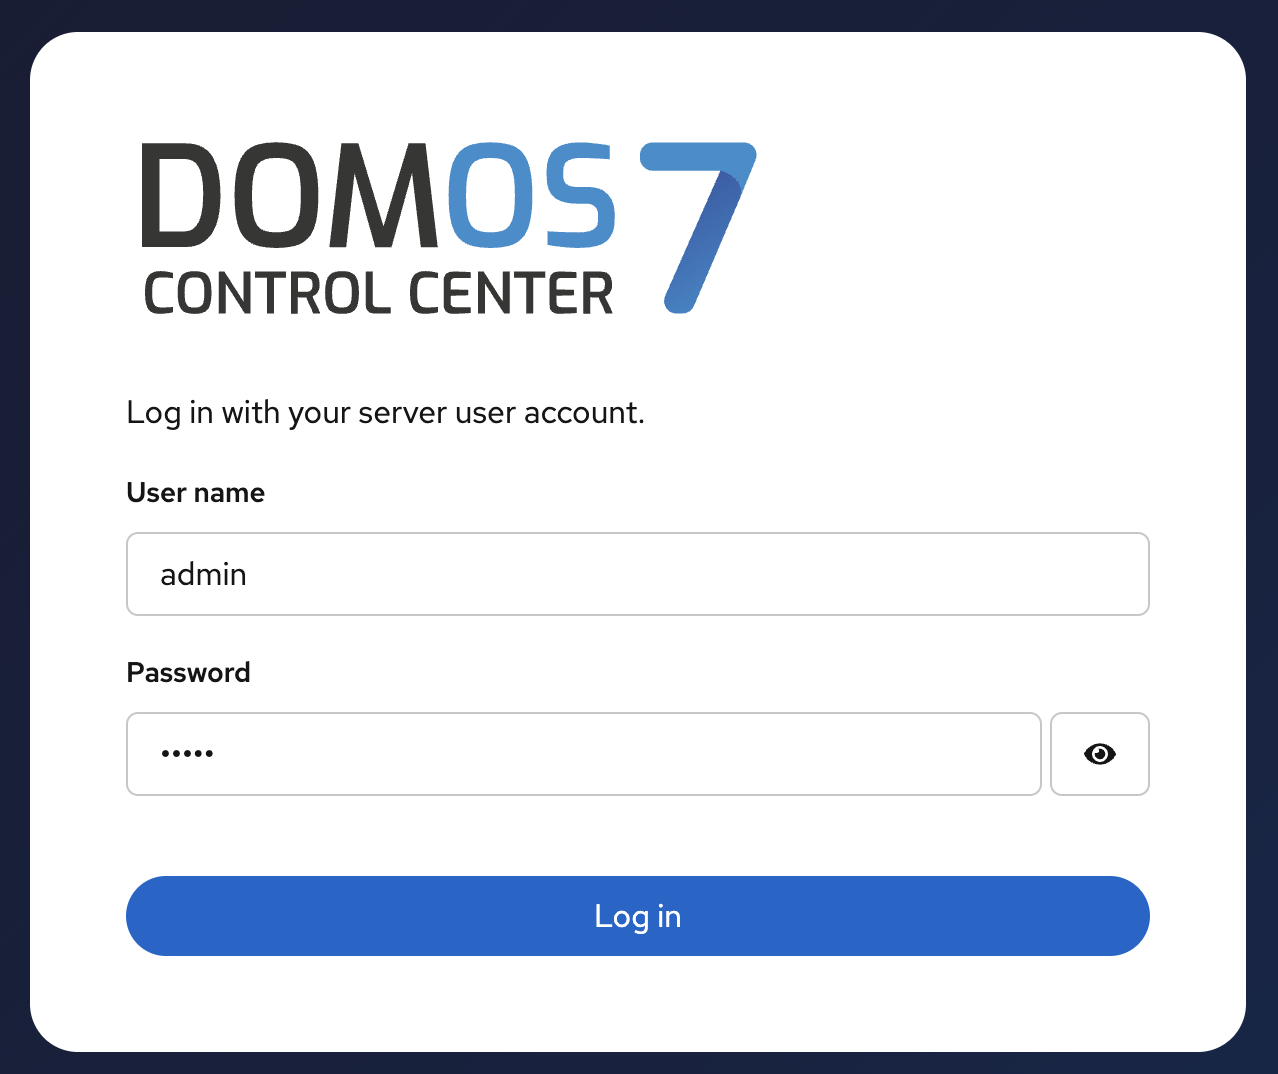
To log in to the DOMOS7 WebUI, open https://IP-OF-YOUR-APPLIANCE:10000 in your web browser (default). The default username is admin and the password is admin. It is recommended to change the password after the first login.
| Type | Detail |
|---|---|
| Default URL | https://IP-OF-YOUR-APPLIANCE:10000 |
| Default Login | admin |
| Default Password | admin |
Configure your workstation with an IP address in the same network as the IP address assigned to your virtual machine in order to access the DOMOS7 WebUI.
Hardware-Appliance
To log in to the DOMOS7 WebUI, open https://192.168.2.1:10000 in your web browser (default). The default username is admin and the password is admin. It is recommended to change the password after the first login.
| Type | Detail |
|---|---|
| Default URL | https://192.168.2.1:10000 |
| Default Login | admin |
| Default Password | admin |
Configure your workstation with IP 192.168.2.2 (for example) and netmask 255.255.255.0 to access the DOMOS7 WebUI.
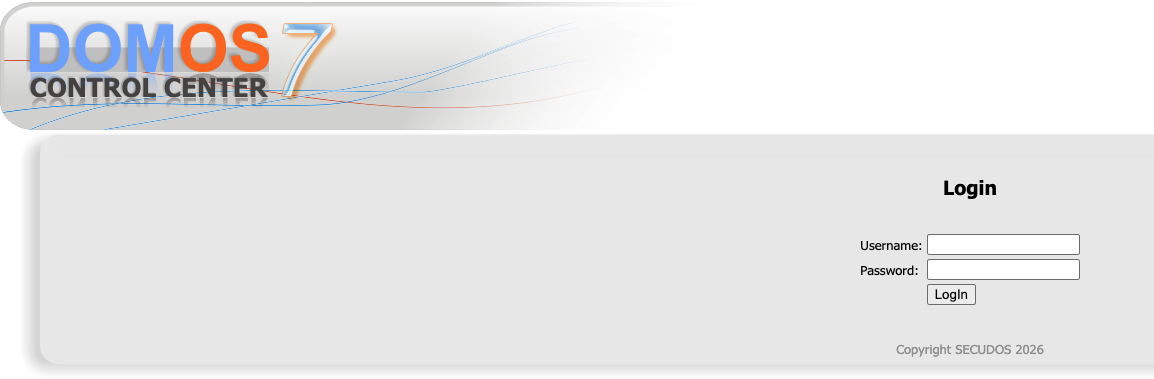
Legacy WebUI
| Type | Detail |
|---|---|
| Default URL | https://192.168.2.1:11000 |
| Default Login | admin |
| Default Password | admin |
The legacy DOMOS6 WebUI is still included in DOMOS7 for compatibility reasons. It is available on port 11000.
Default Password Warning
Default credentials pose a serious security risk to your system and network. Change them immediately after the first login.
Passwords can be changed in Authentication → Passwords.
When logging into the DOMOS7 WebUI, you will be notified if default passwords are still in use. We strongly recommend changing them to secure passphrases.
Activate Settings

Many configuration changes inside DOMOS7 are staged first and only applied after clicking Activate Settings.
This mechanism allows multiple changes to be reviewed before they become active.
Dashboard
This view is useful for quickly identifying system load issues or resource bottlenecks.
After logging in to the WebUI, the Dashboard is displayed. This screen provides information about hostname, uptime, average CPU load, system time, memory, and storage.
The system load describes the average utilization of the system, meaning how many processes are currently using the CPU or waiting for it. The three values represent the average load over the last 1, 5, and 15 minutes.
On the left side, you can navigate between all available sections. Blue highlighted text is clickable and helps with navigation within the WebUI.
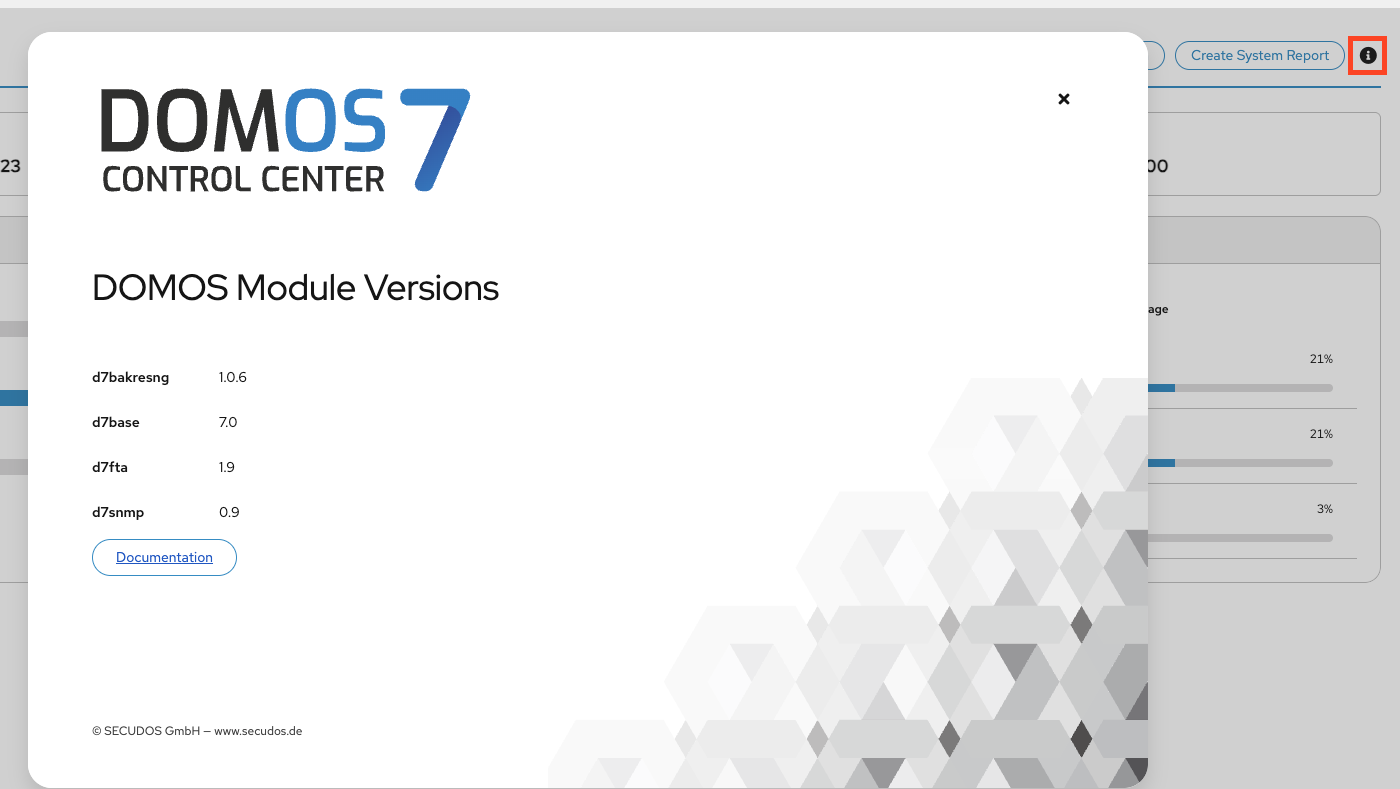
The Create System Report button creates a system report. When triggered, a .tgz file is generated containing all relevant log files for analysis. After completion, the file is available for download in the browser.
Depending on the number of logs, creation may take some time. Please keep the page open during this process.
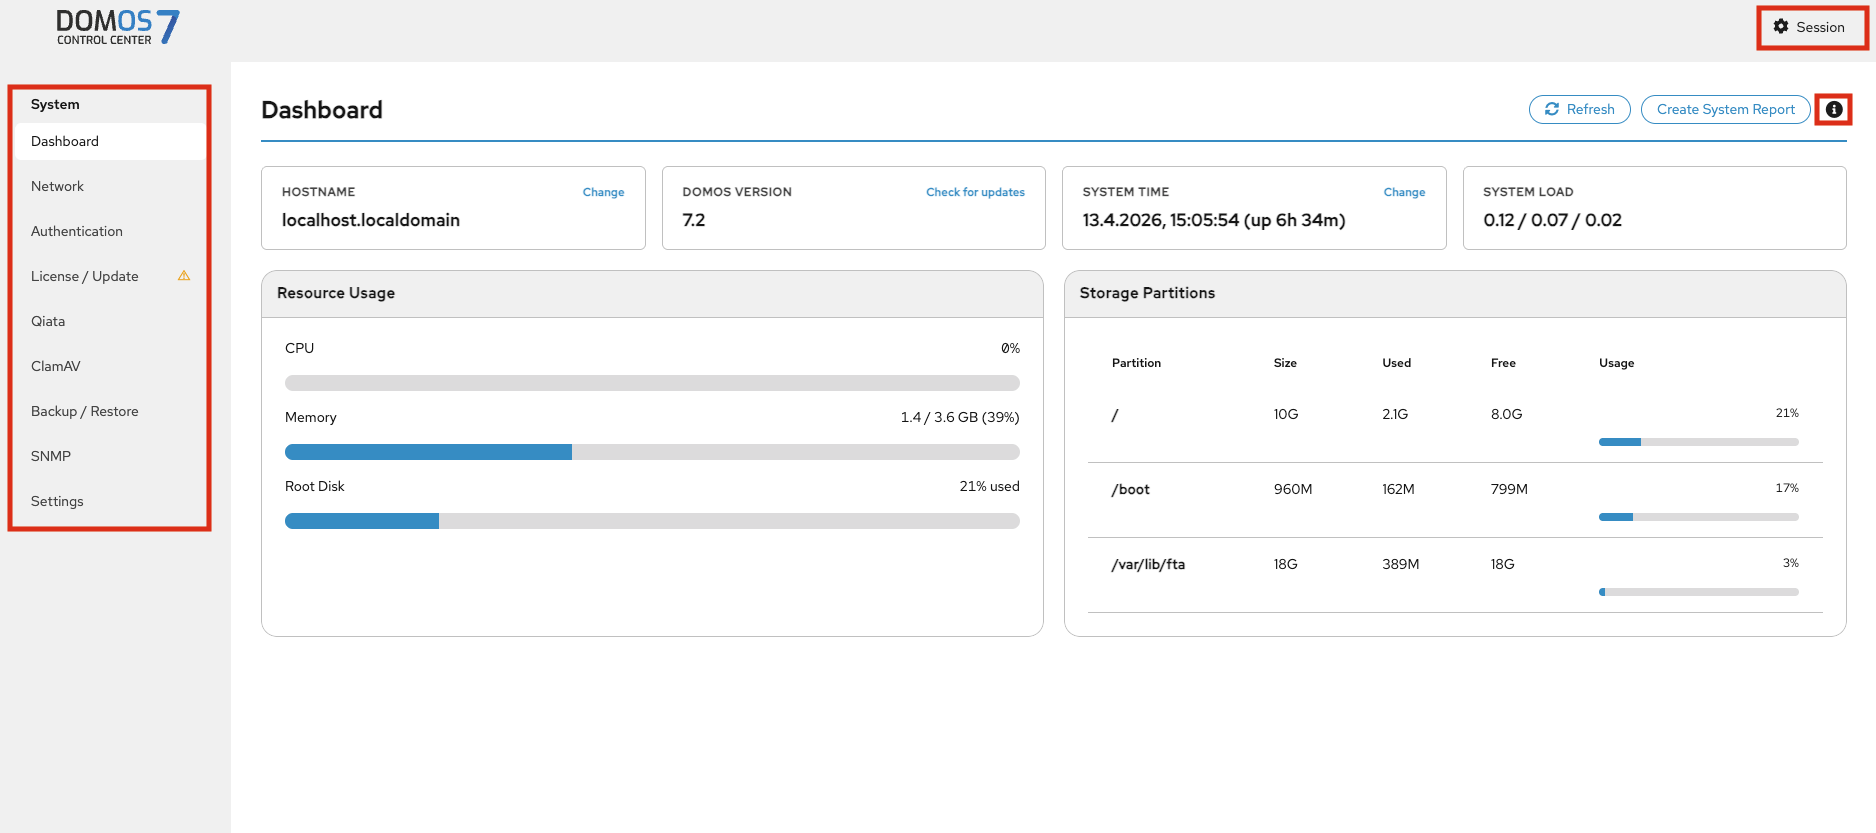
DOMOS7 version and software details are shown by clicking the info button next to "Create System Report".
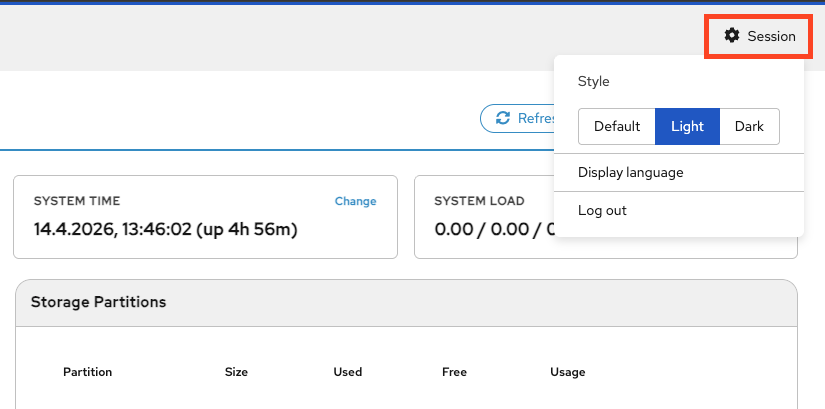
In the session menu, you can switch between light and dark mode, change the display language, and log out of the current session.
Network
Interfaces
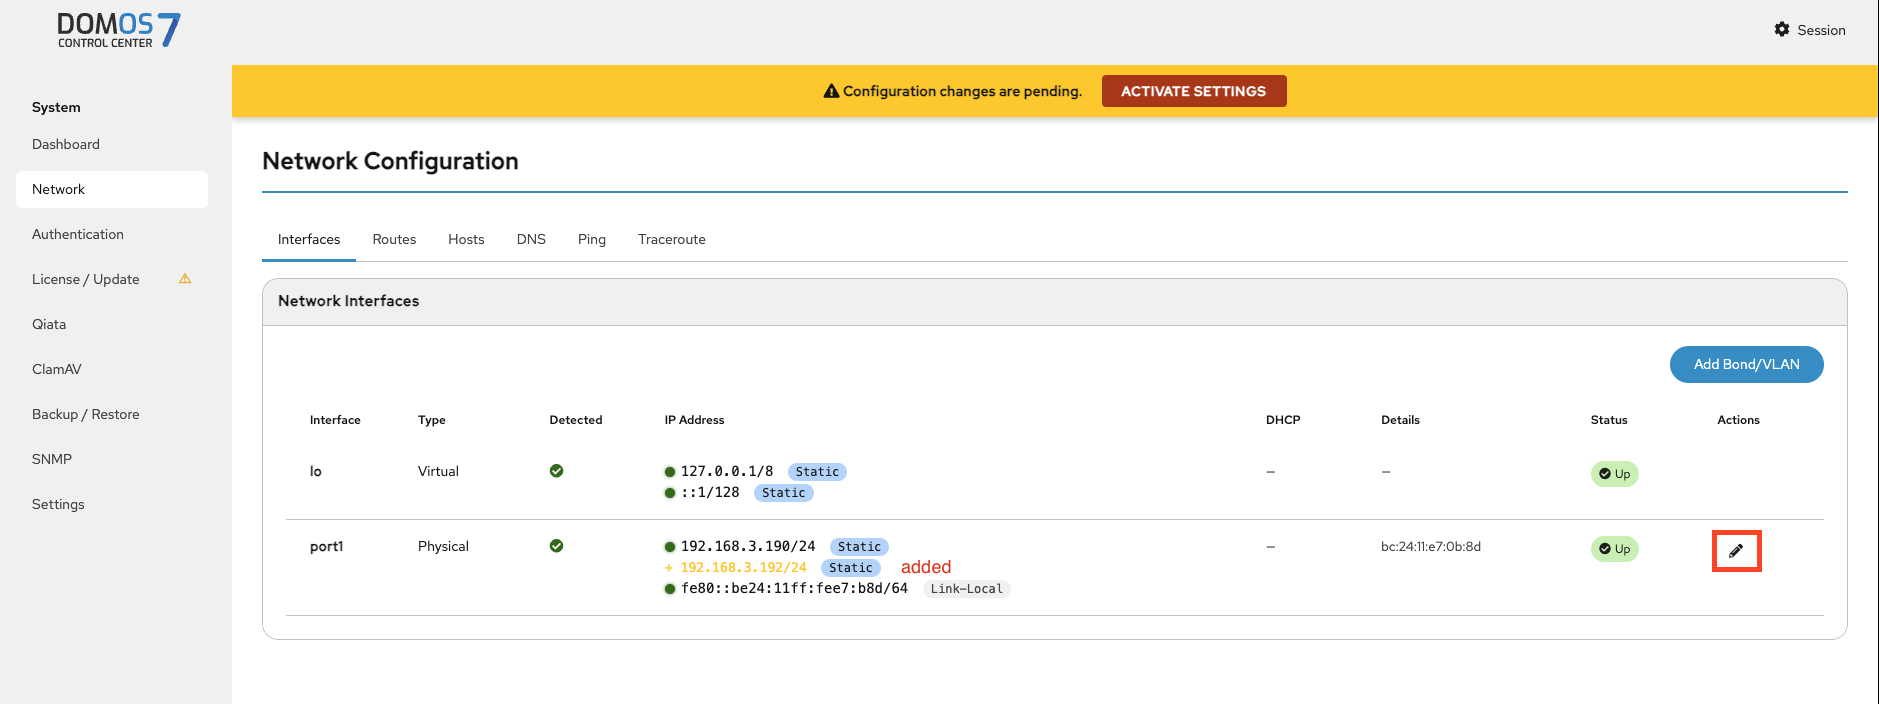
Changes are not applied automatically. You must confirm them using the banner at the top, otherwise they will be discarded.
In the Interfaces tab, you can view all current and active interfaces.
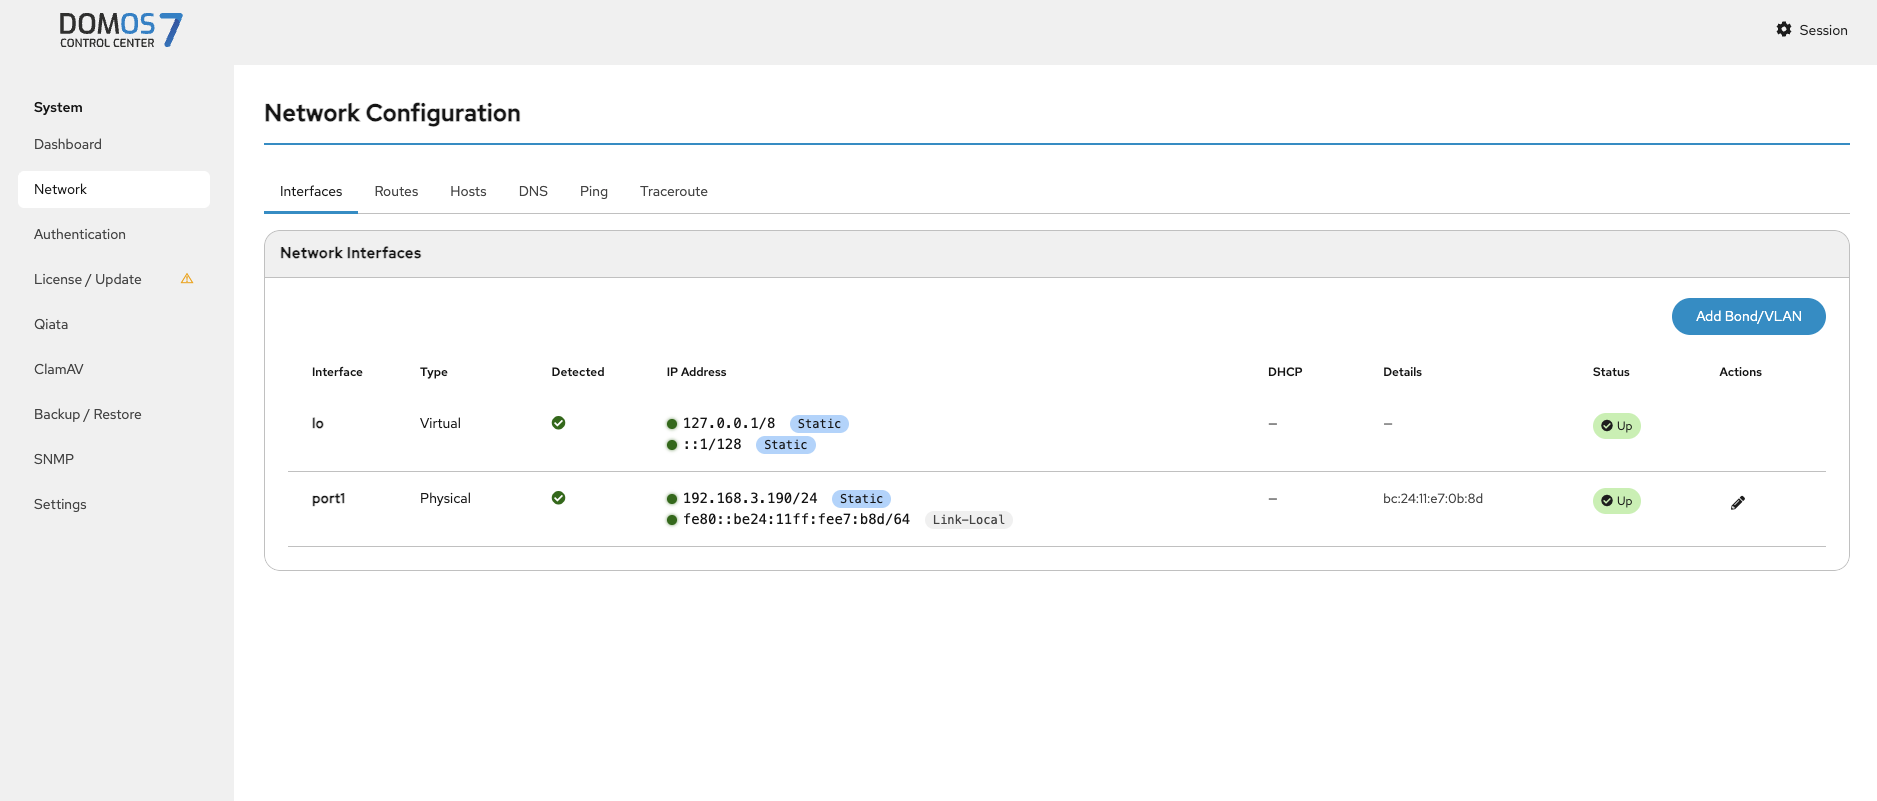
Click the pen icon to edit an interface. Changes must be confirmed via the ACTIVATE SETTINGS banner at the top.
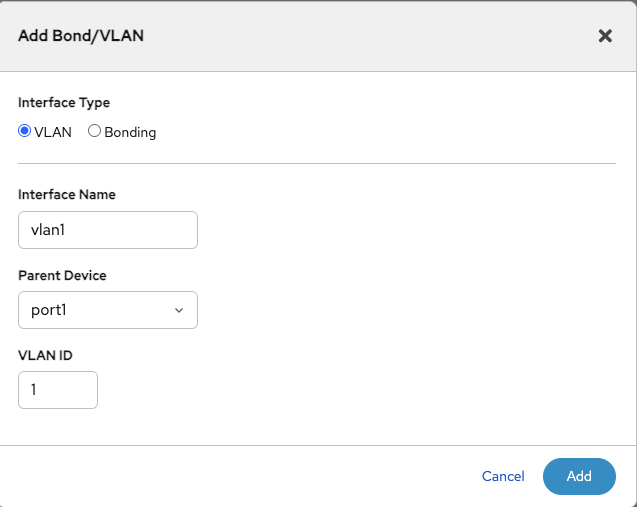
VLAN
VLANs are used to separate network traffic logically within the same physical network.
Add Bond/VLAN
To add a VLAN, click the Add Bond/VLAN button.
Specify a VLAN tag and assign it to an interface or port managed by DOMOS.
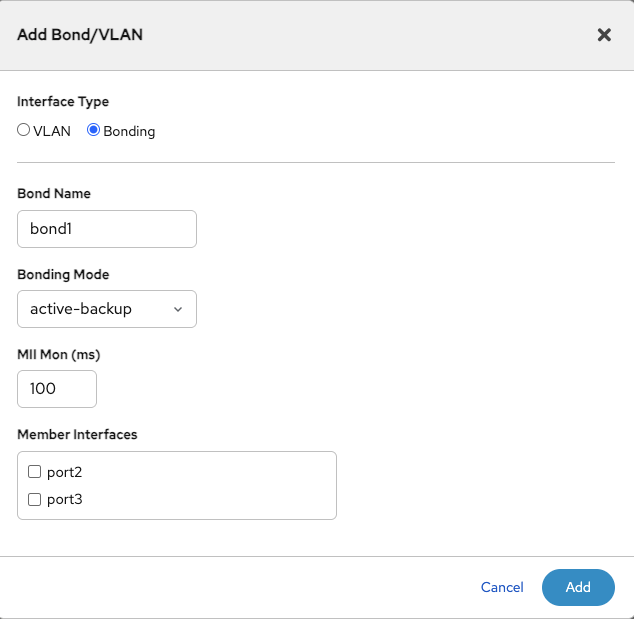
Bonding
Bonding combines multiple interfaces to increase redundancy or throughput.
To add a bond, click the Add Bond/VLAN button. Define a name and mode. Configure MII monitoring to check the link status (default is 100 ms).
DOMOS7 allows you to bond interfaces using the Link Aggregation Control Protocol (LACP). This means that you can bind two interfaces together to operate as one. To add a new bond click on Add new Bond/VLAN. You will be prompted to enter a Name - which will later be used to refer to this interface. The Bonding Mode defines the strategy used to run the bond.
Here you can choose between one of the following:
balance-rr - Round-robin policy: Transmit packets in sequential order from the first available slave through the last. This mode provides load balancing and fault tolerance.
active-backup - Active-backup policy: Only one slave in the bond is active. A different slave becomes active if, and only if, the active slave fails. This mode provides fault tolerance.
balance-xor - XOR policy: Transmit based on the selected transmit hash policy. This mode provides load balancing and fault tolerance.
broadcast - Broadcast policy: transmits everything on all slave interfaces. This mode provides fault tolerance.
802.3ad IEEE - 802.3ad Dynamic link aggregation. Creates aggregation groups that share the same speed and duplex settings. Utilizes all slaves in the active aggregator according to the 802.3ad specification.
balance-tlb - Adaptive transmit load balancing: channel bonding that does not require any special switch support. The outgoing traffic is distributed according to the current load (computed relative to the speed) on each slave. Incoming traffic is received by the current slave. If the receiving slave fails, another slave takes over the MAC address of the failed receiving slave.
balance-alb - Adaptive load balancing: includes balance-tlb plus receive load balancing (rlb) for IPV4 traffic and does not require any special switch support. The receive load balancing is achieved by ARP negotiation.
Furthermore you will have to specify a value for MiiMon.
miimon - specifies the MII link monitoring frequency in milliseconds. This determines how often the link state of each slave is inspected for link failures. A value of zero disables MII link monitoring. A value of 100 is a good starting point. The default value is 0.
Finally, you will have to select the interfaces you wish to bond. Clicking on Add will conclude the configuration. Click on Activate Settings to apply the changes.
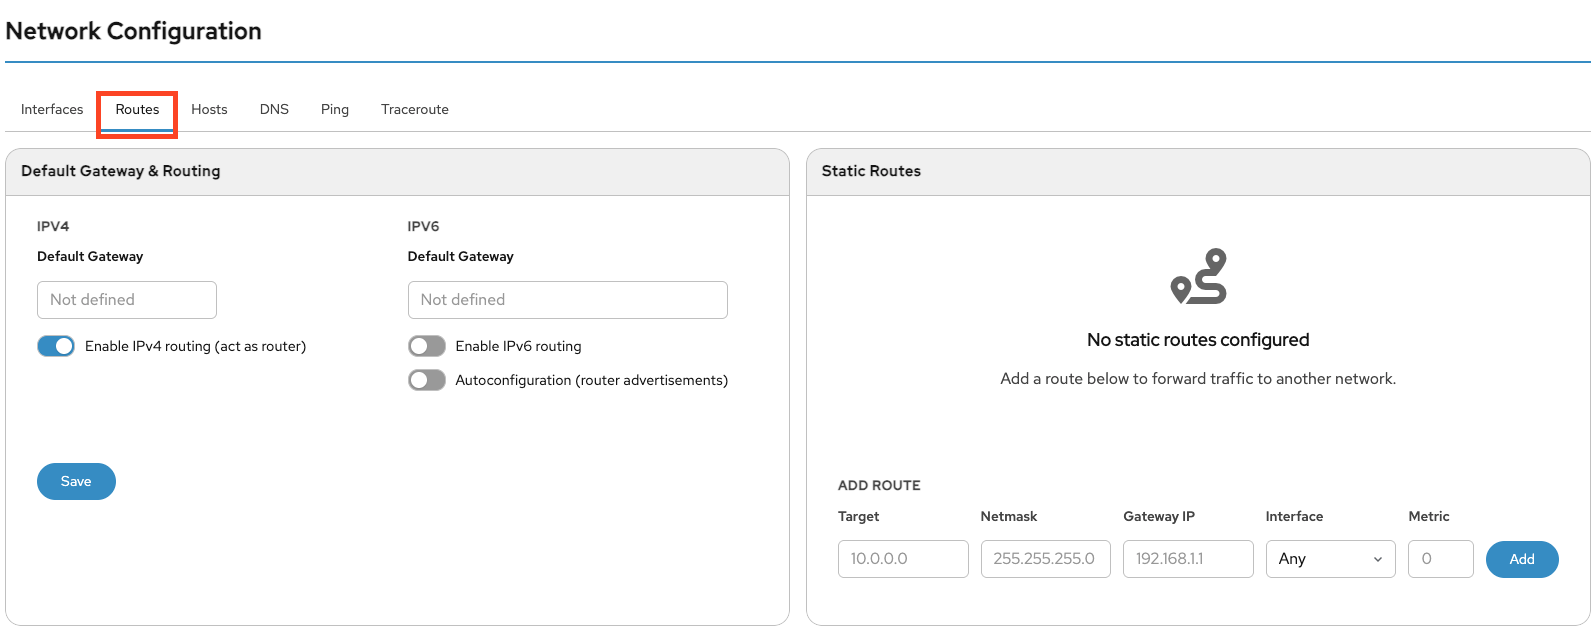
Routes
In the Routes tab, you can configure the default gateway for IPv4 and IPv6. On the right side, you can add static routes.
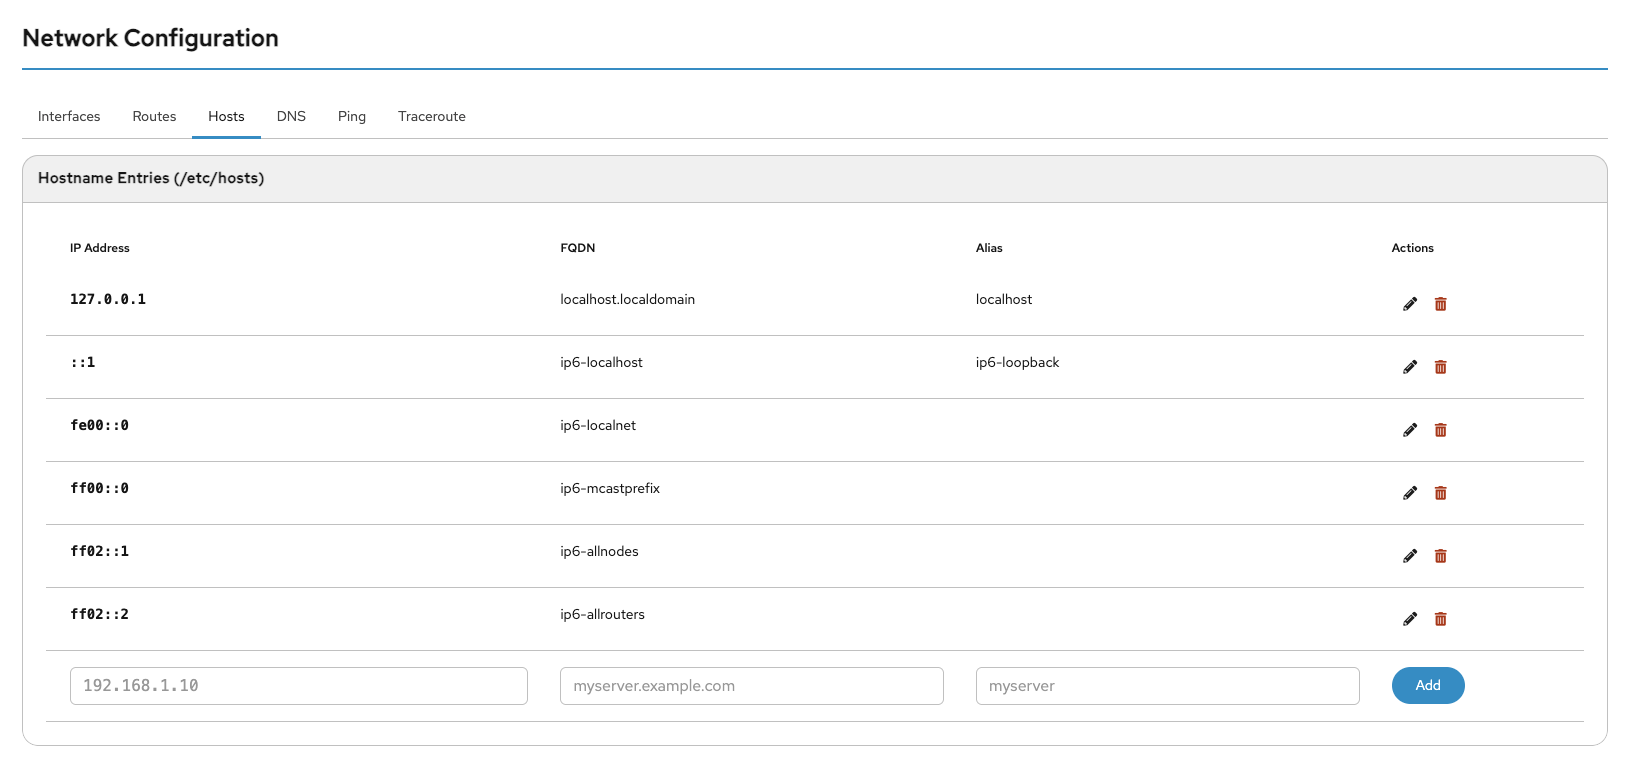
Hosts
In the hosts list, you can edit existing hosts by clicking the pen icon or add new hosts.
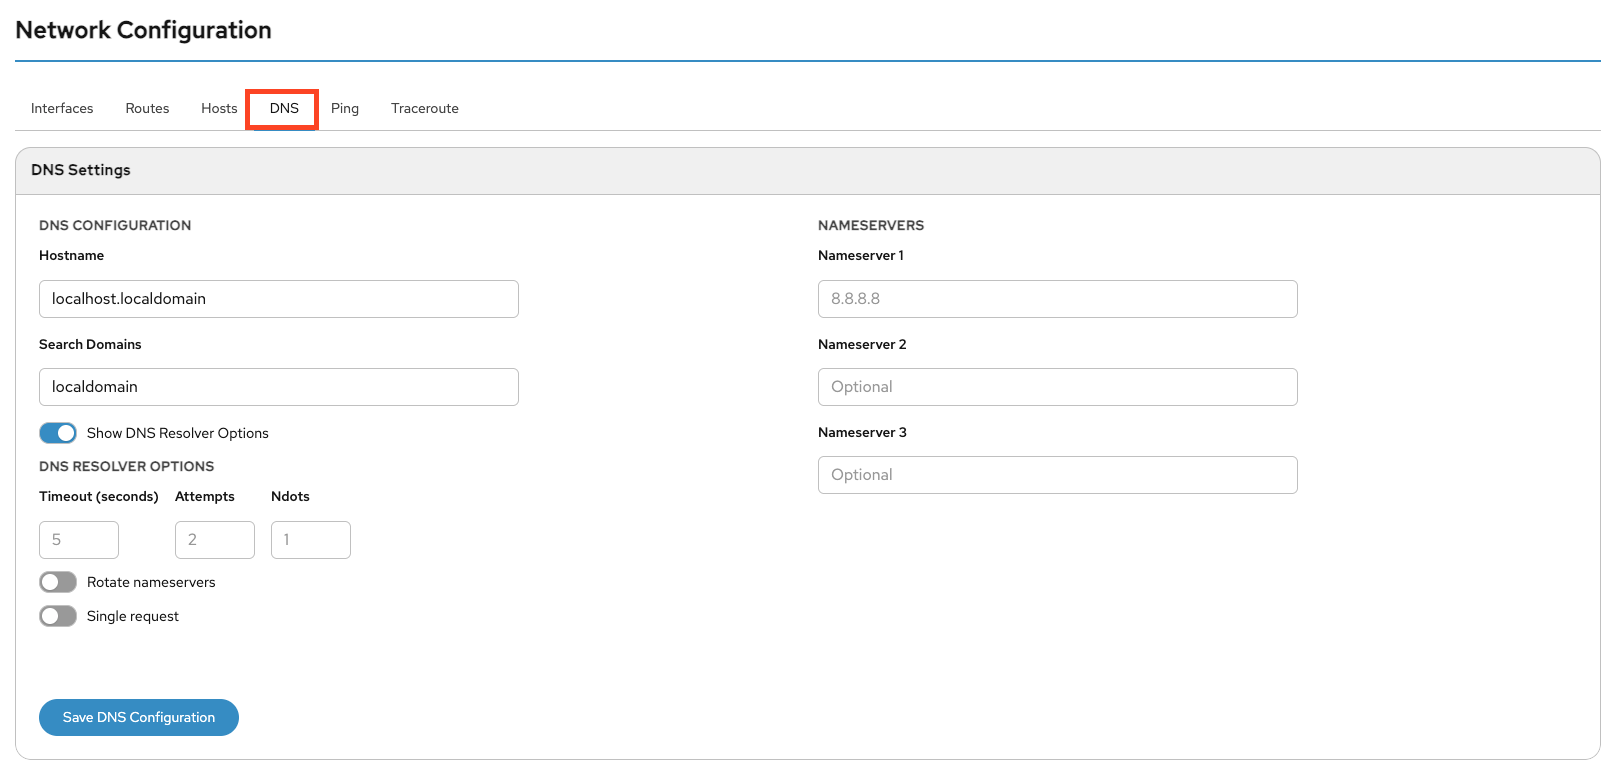
DNS
Here you can configure the system hostname and DNS server(s). At least one functional DNS server must be configured to resolve domain names.
You can define a Search Domain to automatically append it to hostnames that are not specified as FQDNs.
You can also configure whether DNS queries are sent in parallel and whether the system rotates between configured nameservers.
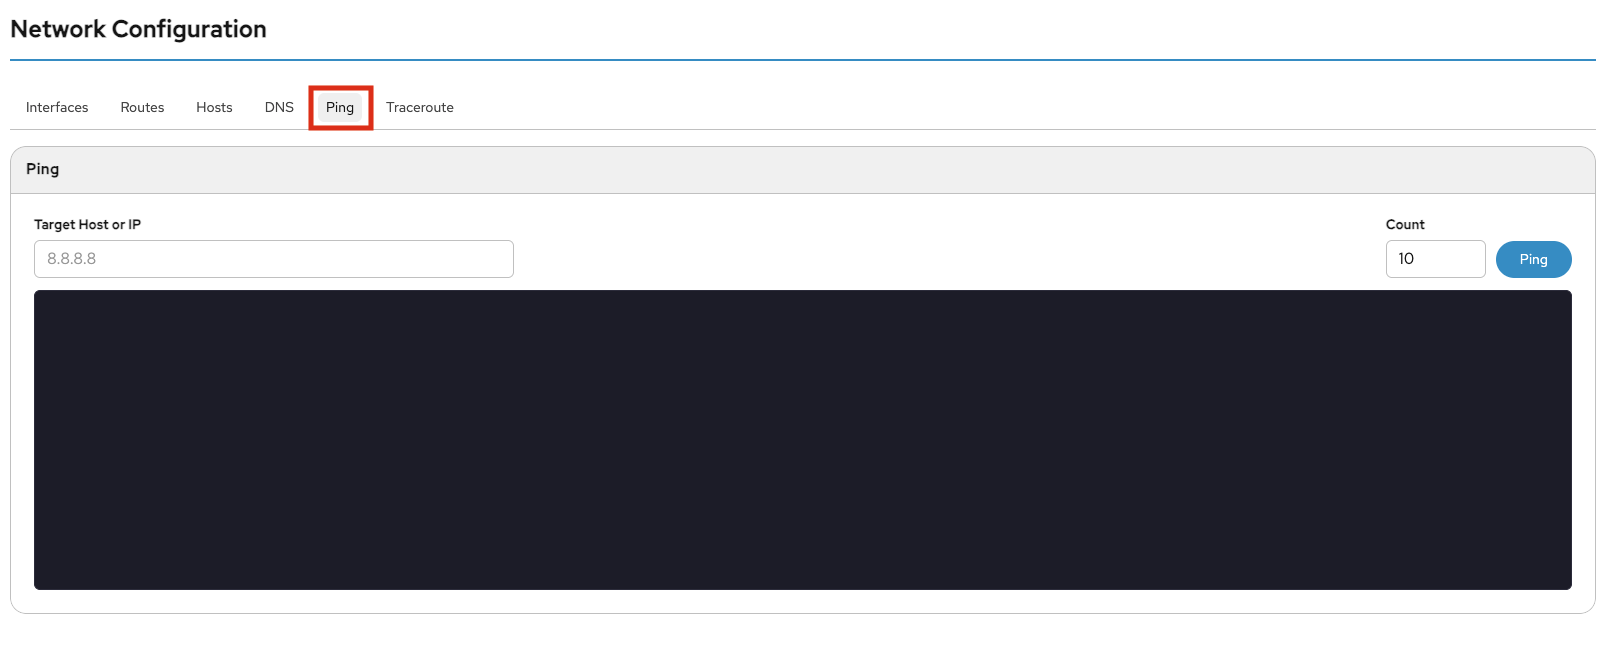
Ping
Use Ping to verify that a host is reachable. Enter an IPv4/IPv6 address or hostname. Optionally, specify the number of packets (default is 10). Click Ping to start the test.
Traceroute
Traceroute is a network diagnostic tool used to display the route packets take across an IP network.
Enter an IPv4/IPv6 address or hostname in the Destination field. Optionally adjust the Maximum TTL. Click Traceroute to start. The browser will refresh automatically to display results.
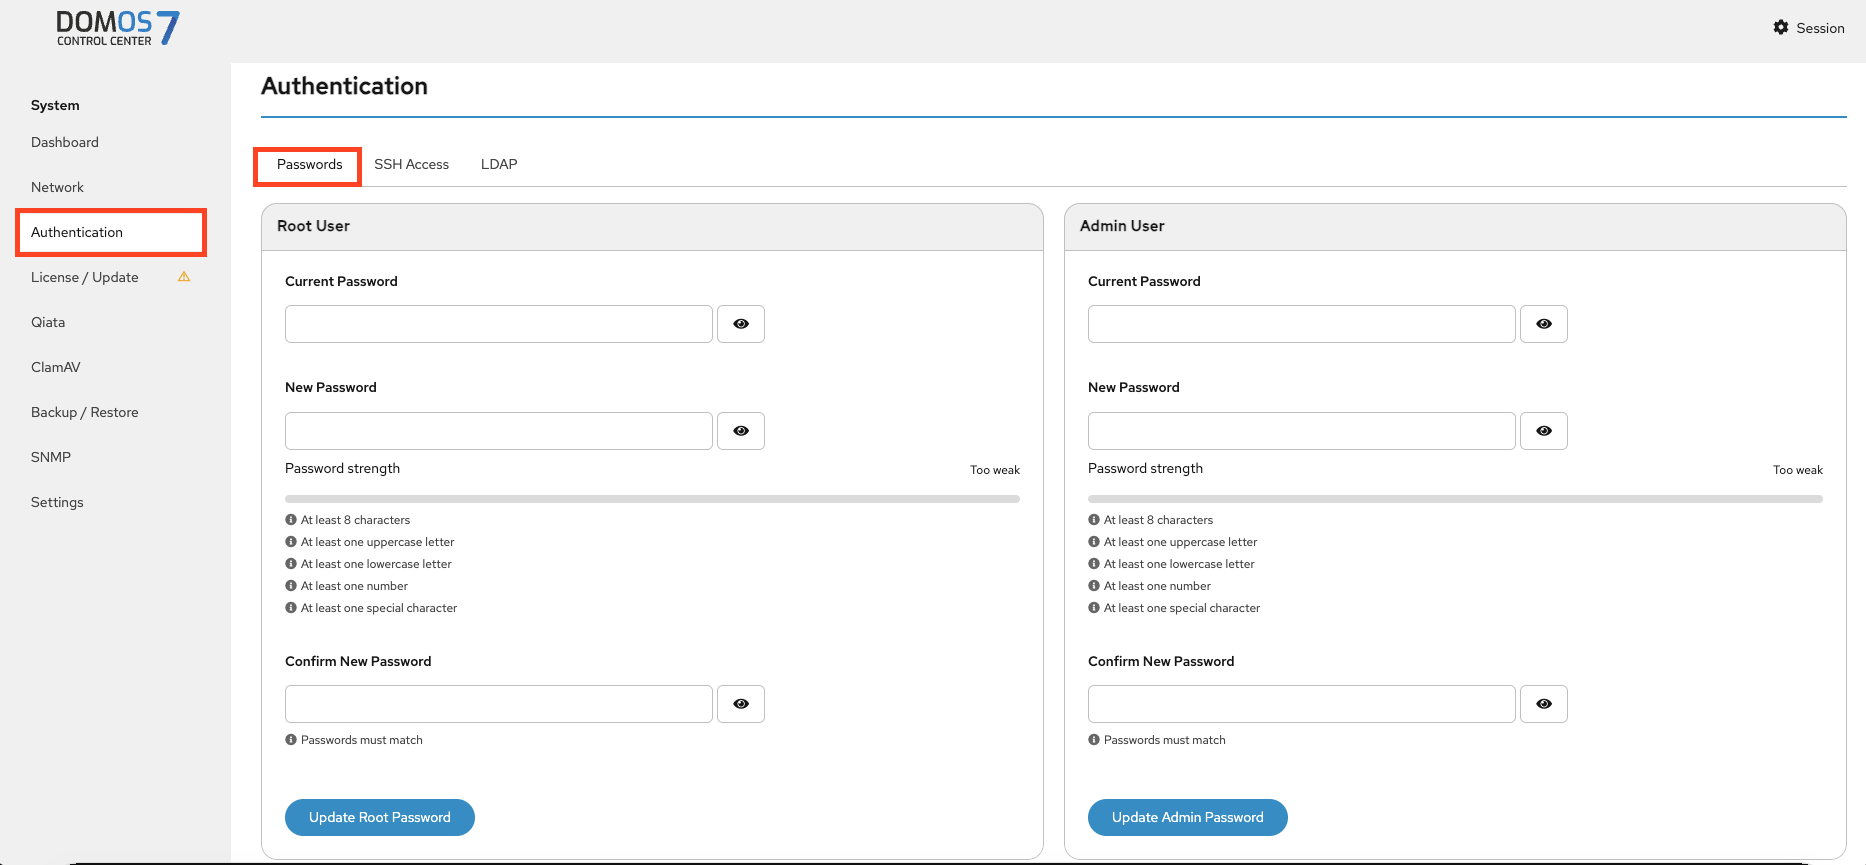
Authentication
Password
In the Passwords tab, you can change the passwords for the Root and Admin users.
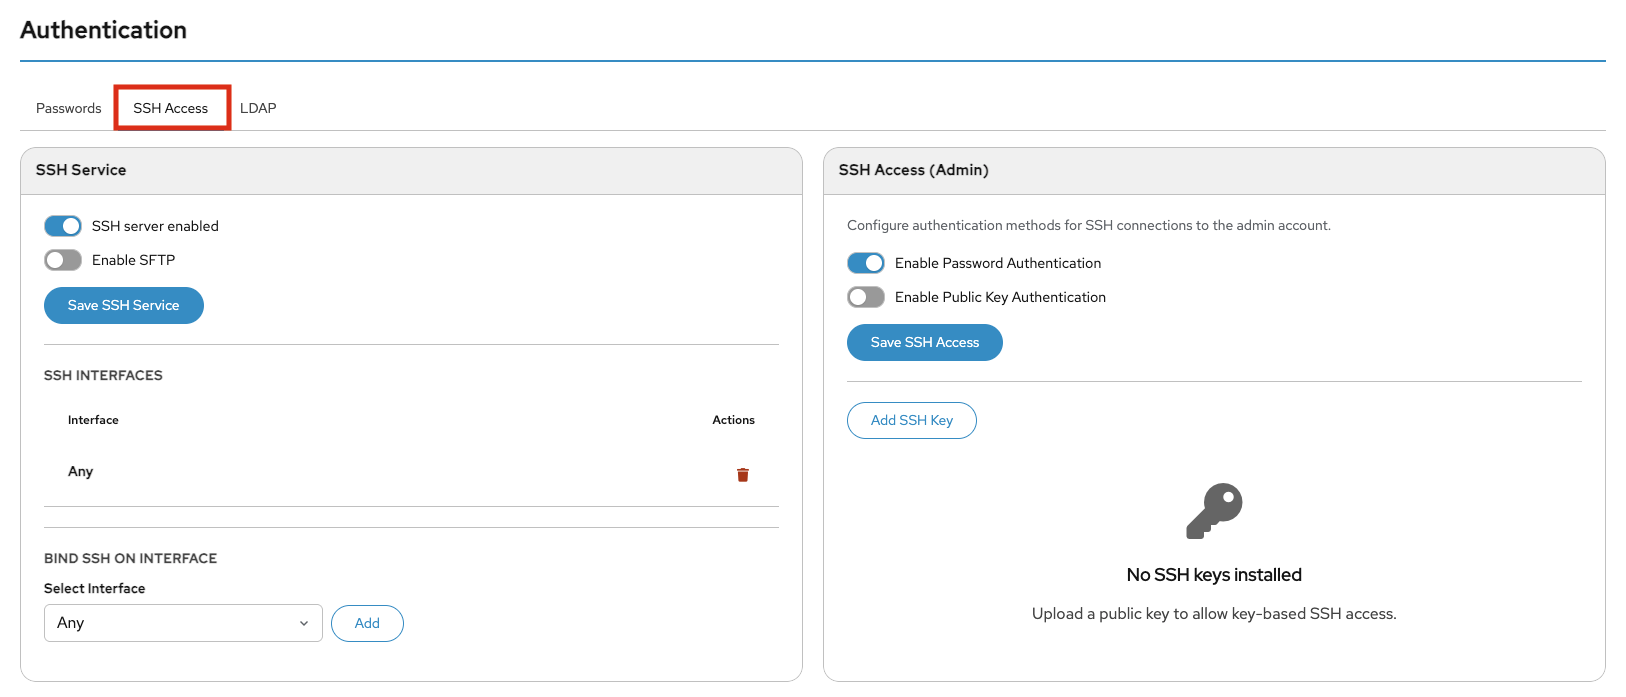
SSH Access
This section allows you to enable and configure SSH access, define how the Admin user authenticates (password or SSH keys), optionally enable SFTP, and control which interfaces accept SSH connections.
SFTP (SSH File Transfer Protocol) enables secure file transfers over the encrypted SSH connection.
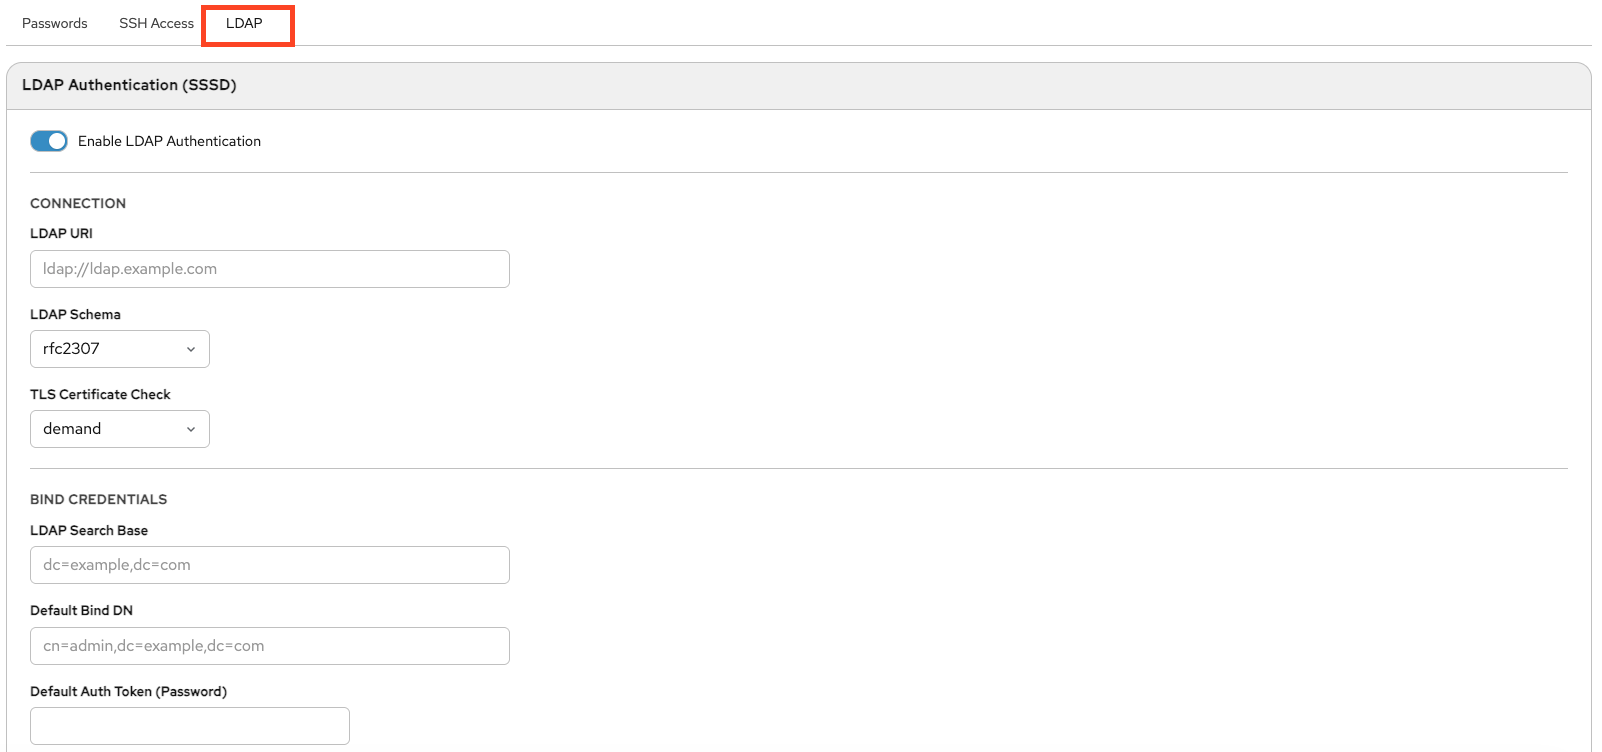
LDAP
LDAP authentication allows centralized user management via an external directory service such as Active Directory.
You can find the following configuration settings on this page.
LDAP Authentification - Switch this on to use LDAP authentification
WebUI Login - Allow LDAP users to login into DOMOS WebUI
SSH Login - Allow LDAP users to login via SSH
SSH Login using key authentification - Allow SSH pubkey authentification
Sudo - Allow LDAP users to gain root permissions using sudo
LDAP URI- URI of LDAP server (e.g. ldaps://FQDN:Port)
LDAP Schema - Select LDAP scheme to use. Currently the following are available: rfc2307, rfc2307bis and IPA
LDAP Check TLS Certificate - Select checking mode of TLS certificate
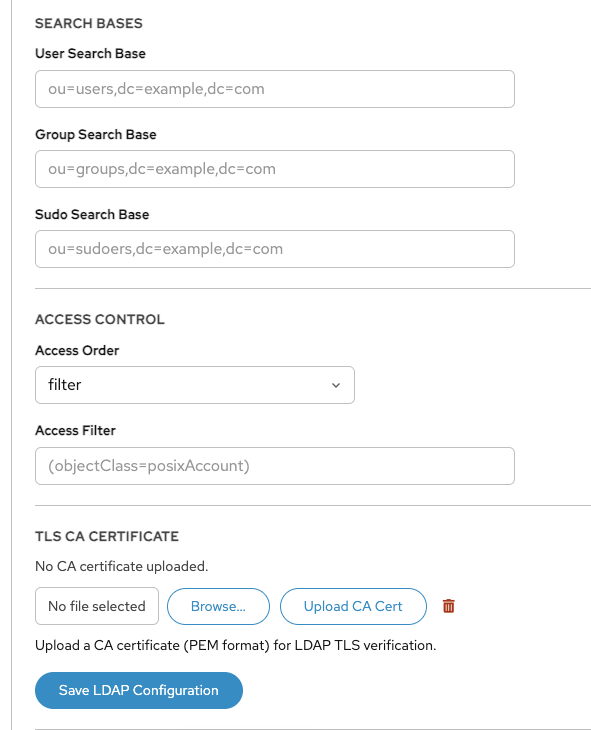
TLS CA Certificate - If needed an own CA certificate can be uploaded here. A short info of an already uploaded CA certificate will displayed here. The Upload New Certificate button allows to upload a new certificate and the Remove button deletes the certificate.
LDAP Search Base - The default base DN to use for performing LDAP user operations
LDAP Default Bind DN - Bind DN to access LDAP server
LDAP Default Authentication Token - Password for Bind DN
LDAP User Search Base - Optional base DN and Filter for users
LDAP Group Search Base - Optional base DN and Filter for groups
LDAP Sudo Search Base - Optional base DN and Filter for sudo access
LDAP Access Order - Access control options
LDAP AccessFilter - Search filter for users (needed if Access Order is set to filter)
This section allows to configure to get authentification data from an LDAP server. So additional users can login into the DOMOS system without having an account on the DOMOS system itself. Next to a normal password even a public SSHKey can be retrieved from LDAP to use passwordless pubkey authentification. After login on the commandline users can use the command sudo to gain root permissions. Users, identified by this way, can login into the DOMOS WebUI using own credentials.
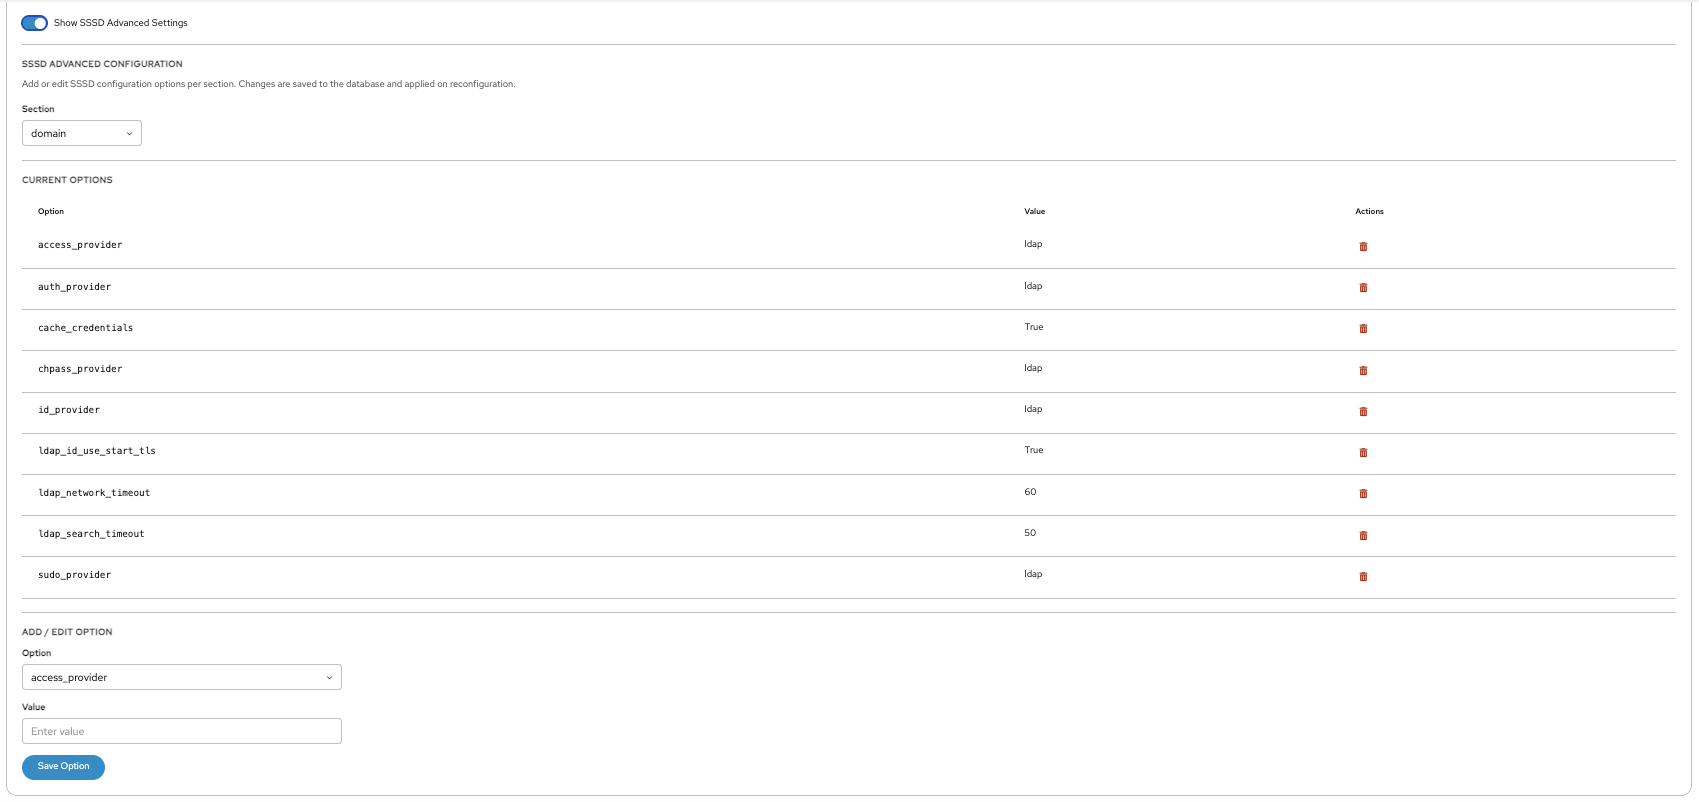
The configuration is splitted into a dialog with the most useful settings and a page for advanced configuration settings.
Here you define where users, groups, and sudo roles are located in the LDAP directory, set access rules, and configure CA certificates.
Advanced SSSD settings allow fine-tuning of identity lookup, authentication behavior, caching, and timeouts.
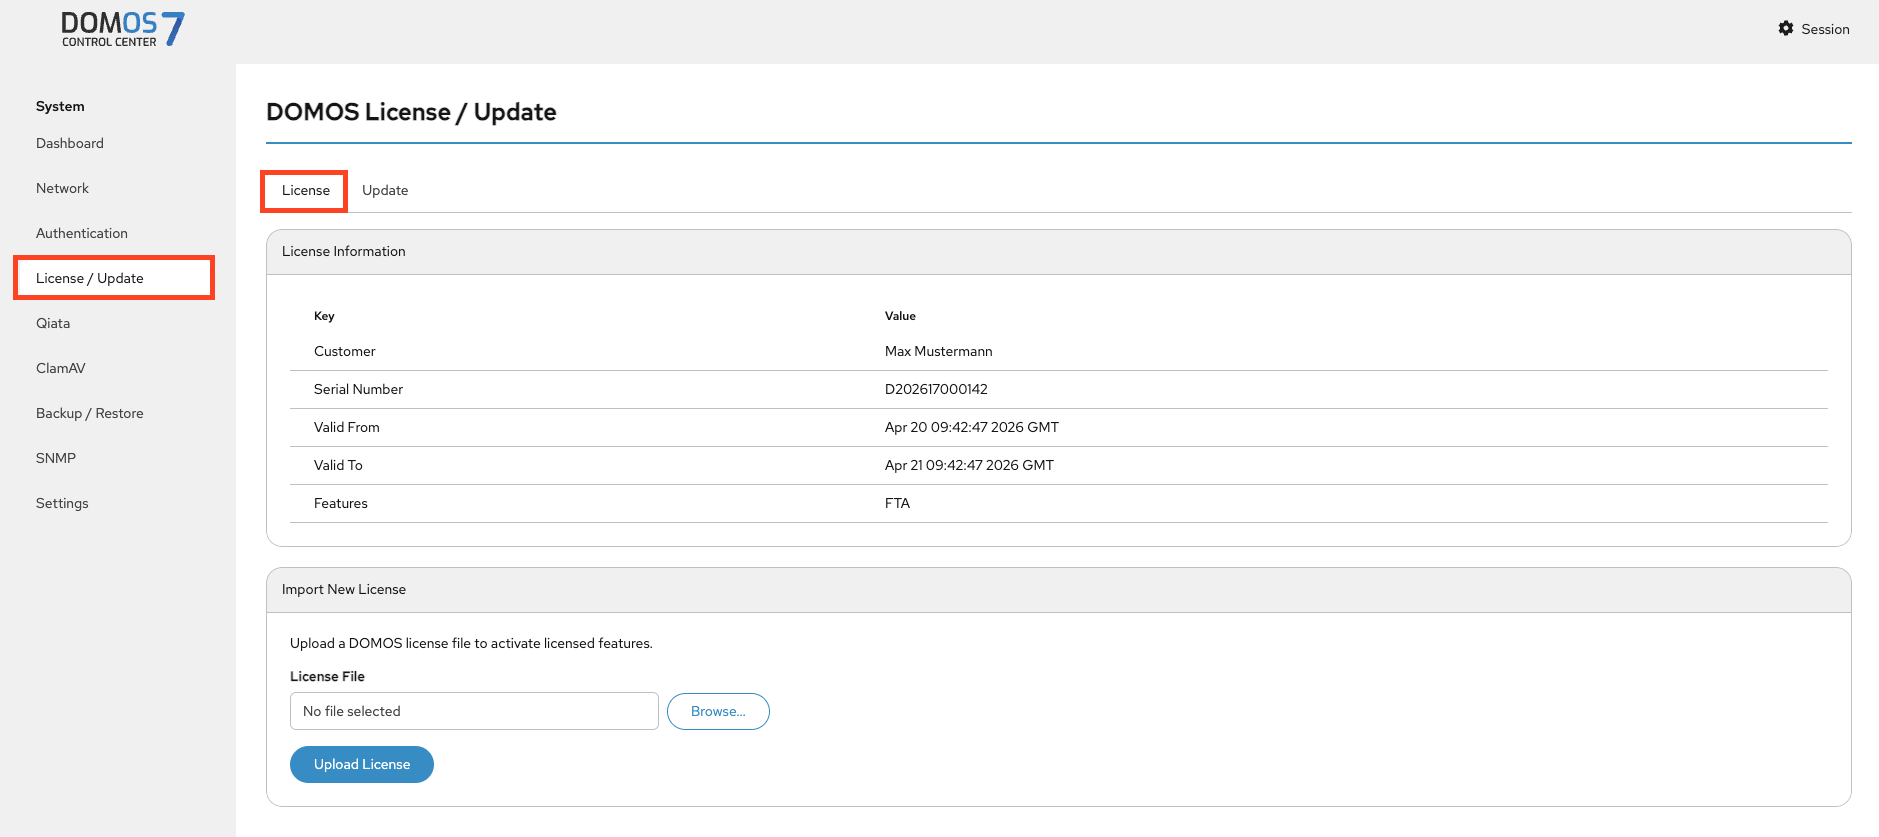
License / Update
License
The license defines which features are available and whether the system is allowed to receive updates.
DOMOS7 requires a valid license for operation and software updates.
The overview page displays the currently installed license and its enabled features.
A license contains the following information:
Name – License holder
UID – Unique identifier
StartDate – Start date of validity
EndDate – Expiration date
Features – Included features
To update the license, upload a new license file using Browse and click Upload.
Subscription License [Qiata only]
The system periodically checks the license server for available Qiata licenses.
A subscription license has no fixed duration and remains valid until terminated. It is checked regularly for available Qiata licenses on the license server.
Ensure network connectivity to ls3.secudos.de for automatic checks.
If a Qiata license is available, it is installed automatically.
Standard License
A standard license has a fixed validity period and must be replaced after expiration. Qiata licenses must also be imported manually.
Update
Updates require a valid license.
You can update DOMOS7 automatically via the internet or manually.
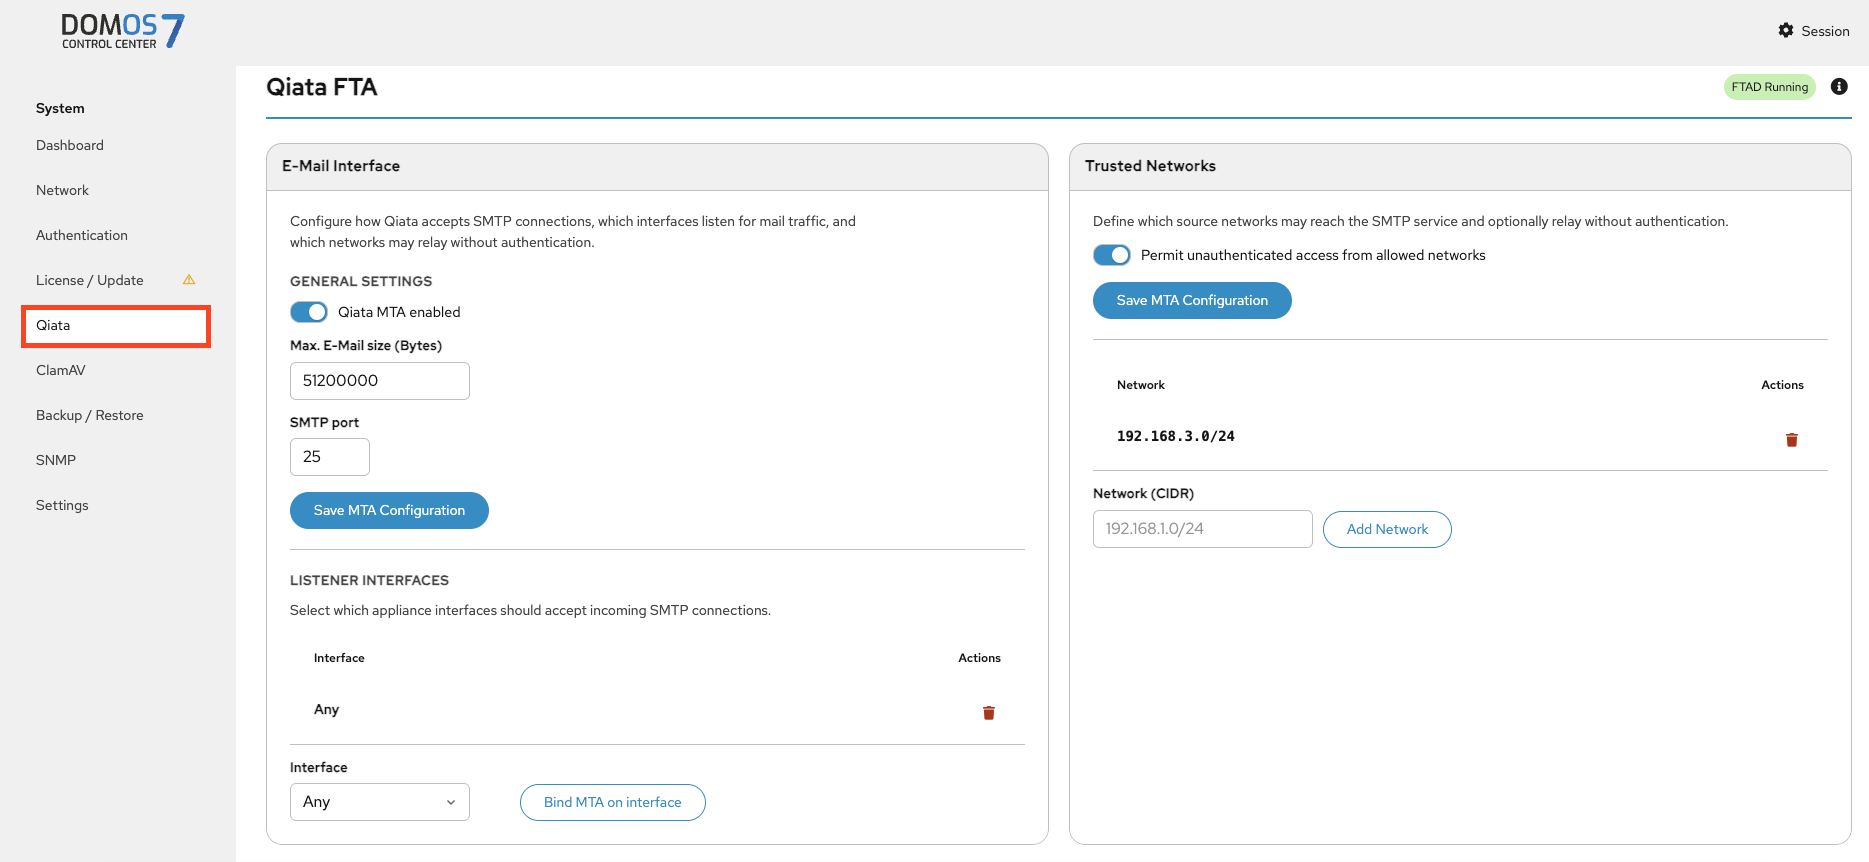
Qiata [Qiata only]
Qiata is the system component responsible for secure email processing.
This section configures SMTP services. You can enable mail handling, define limits and ports, and assign interfaces.
If Permit unauthenticated access from allowed networks is enabled, trusted networks can be defined.
ClamAV [Qiata only]
Overview
Monitor antivirus status, signature databases, and perform updates.

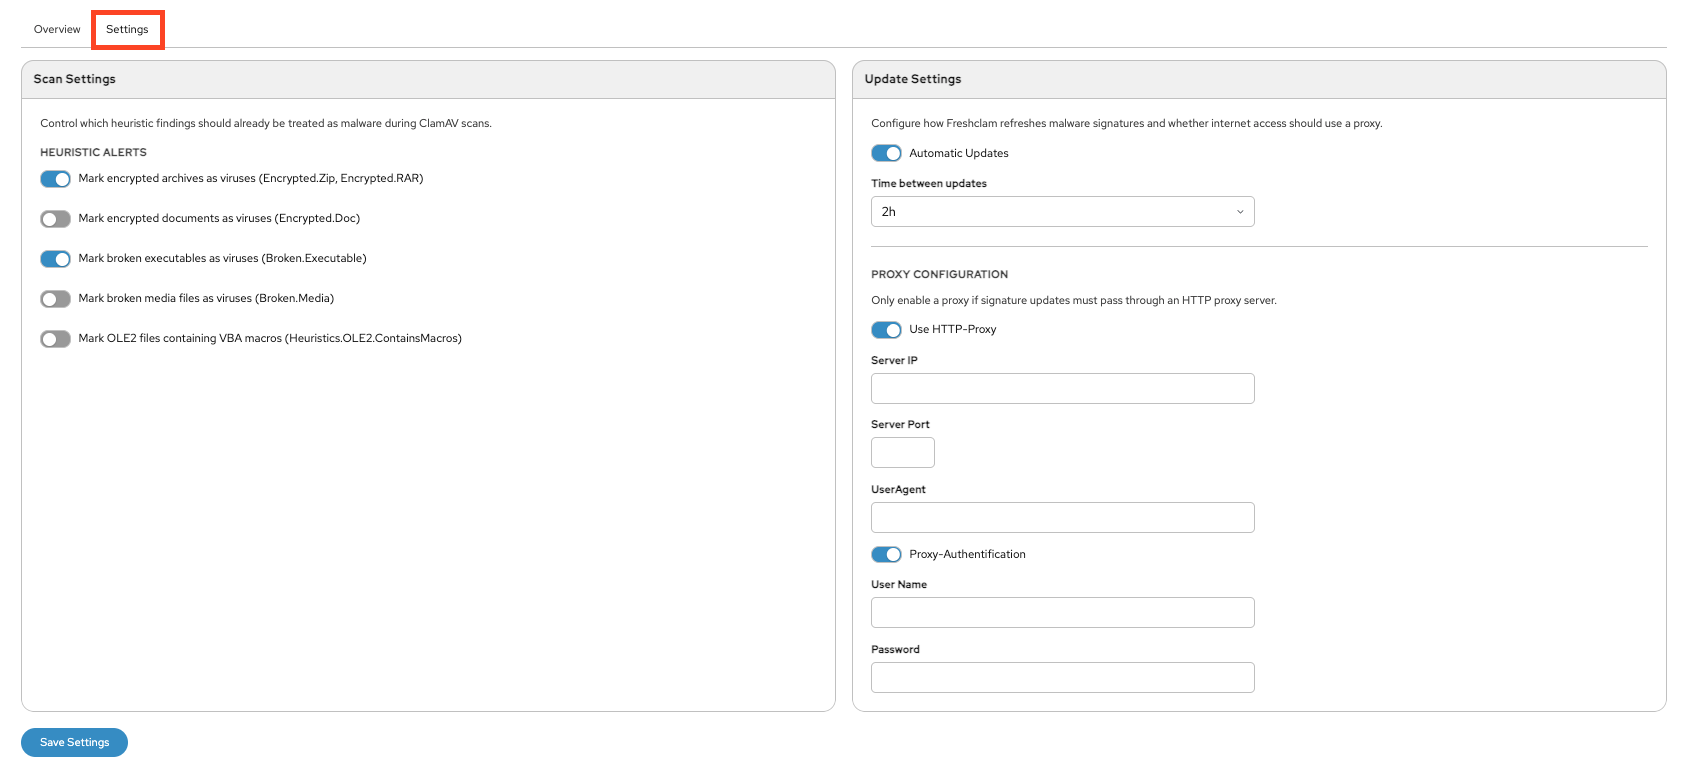
Settings
Configure scan behavior, define what types of files ClamAV detects as malicious, set update intervals, and optionally configure proxy settings.
Backup / Restore
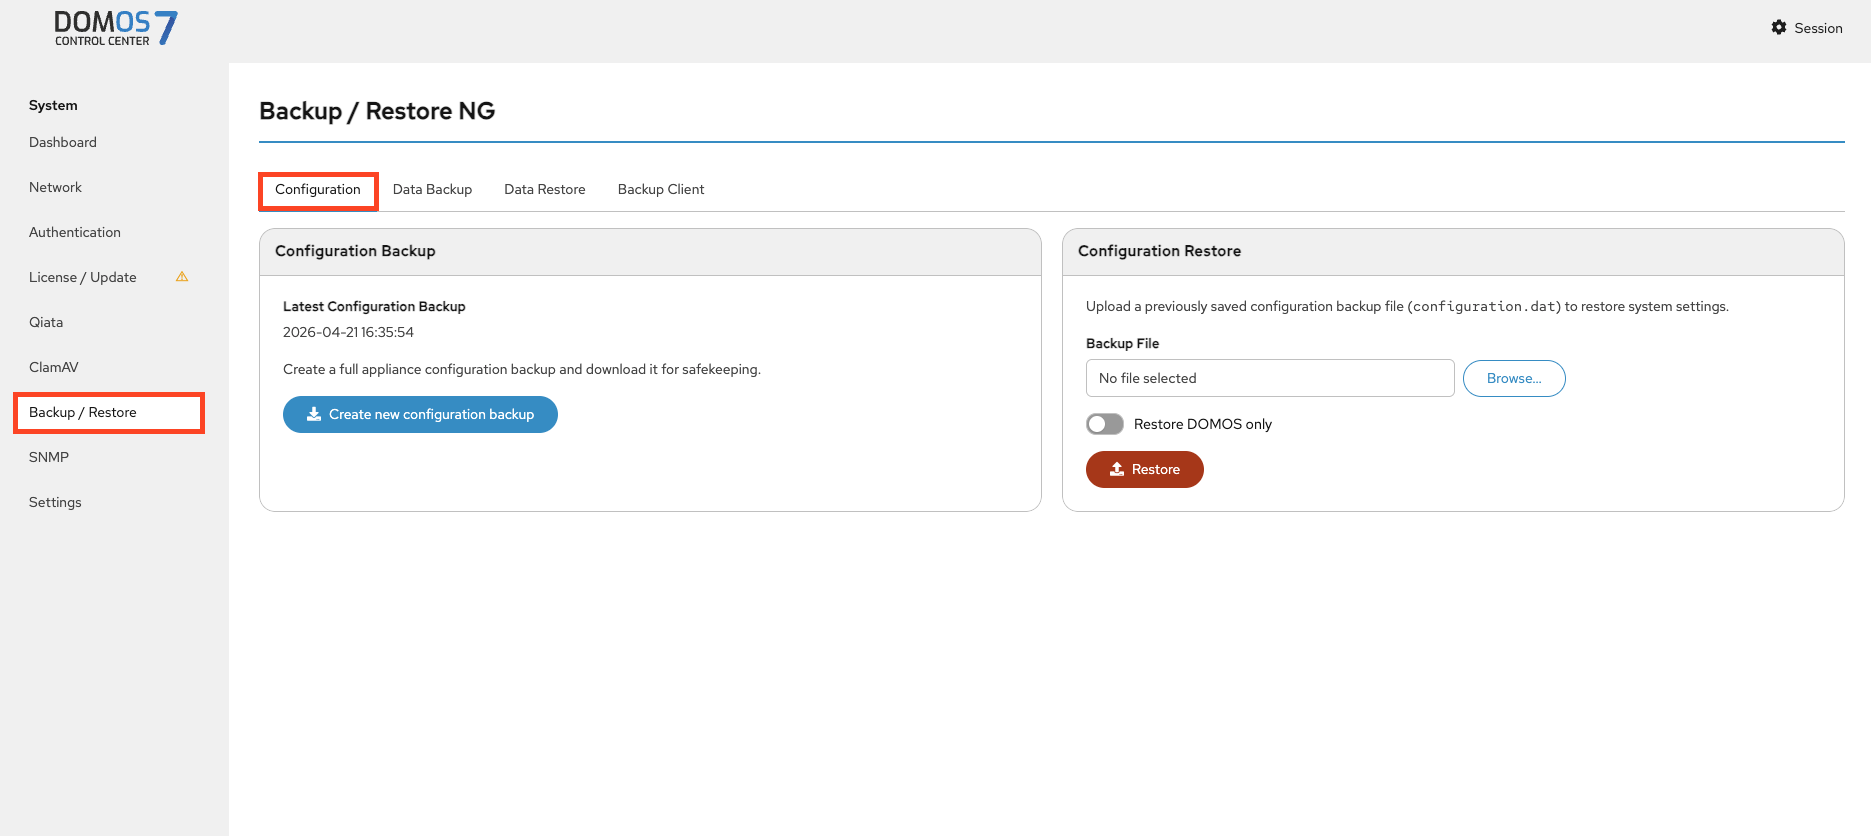
Configuration
This page lets you create and download a backup of the system configuration or restore it from an existing backup file. You can choose to restore only the DOMOS system configuration.
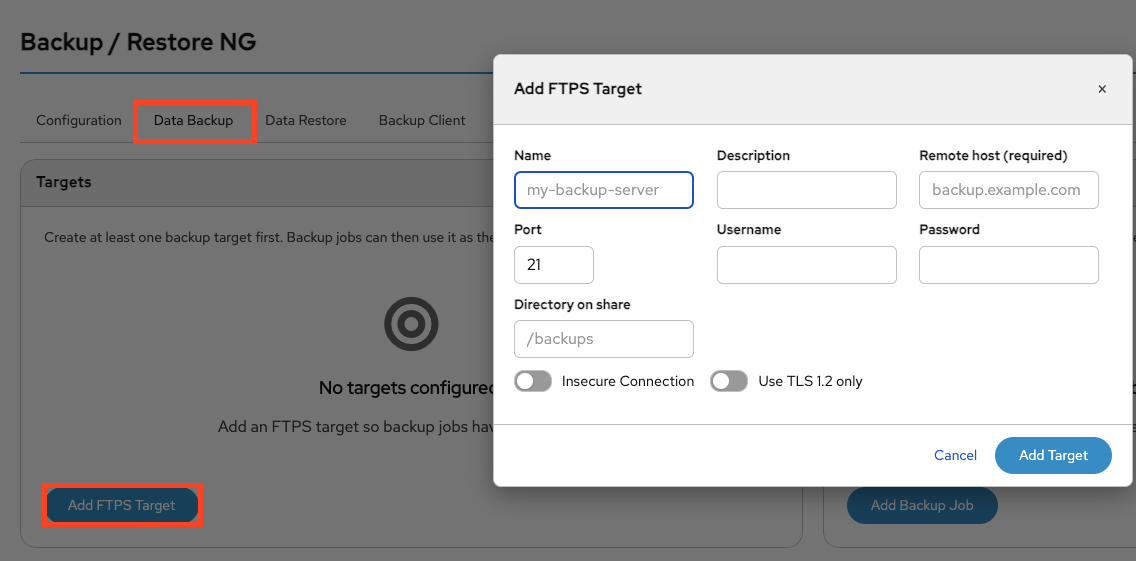
Data Backup
Add Target
This page allows you to create a backup target by configuring an FTPS server, including the host, credentials, and target directory.
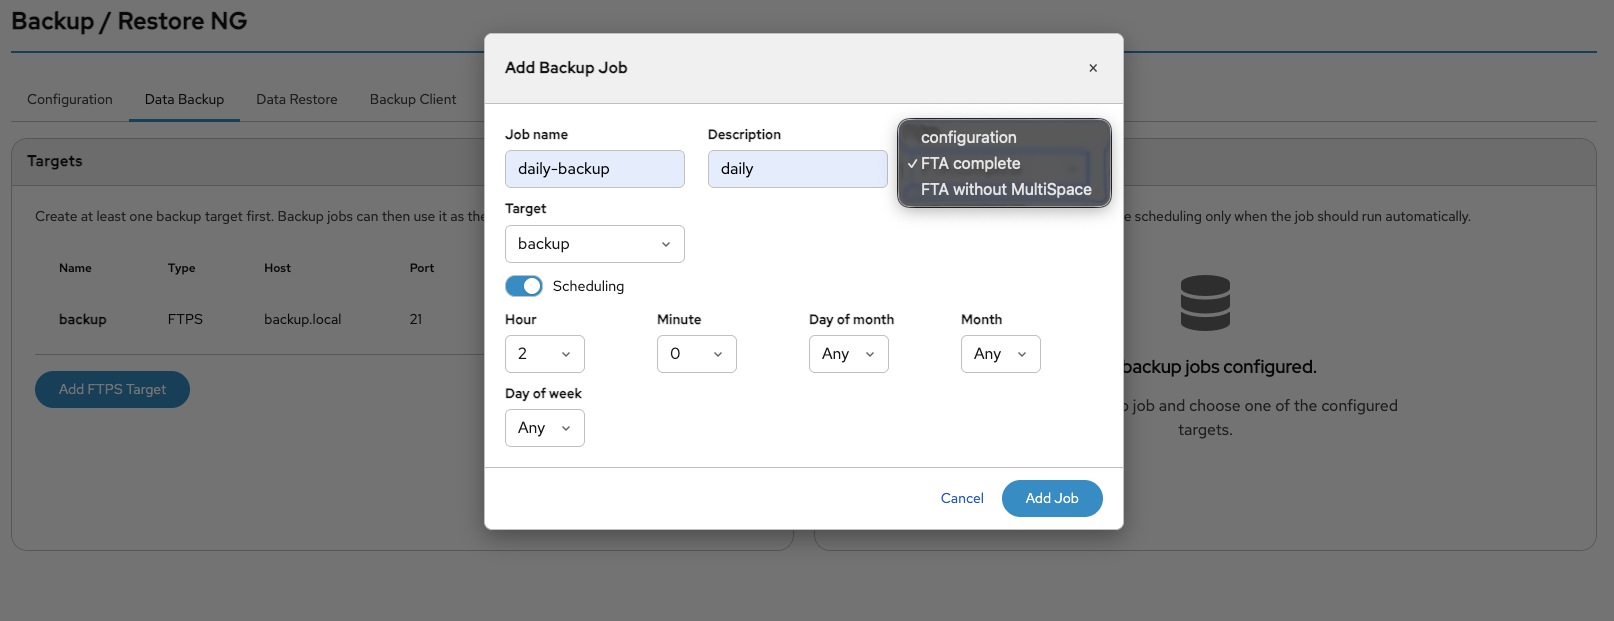
Add Job
This page allows you to create a backup job by selecting a backup target, defining the data types to back up, and configuring the execution schedule.
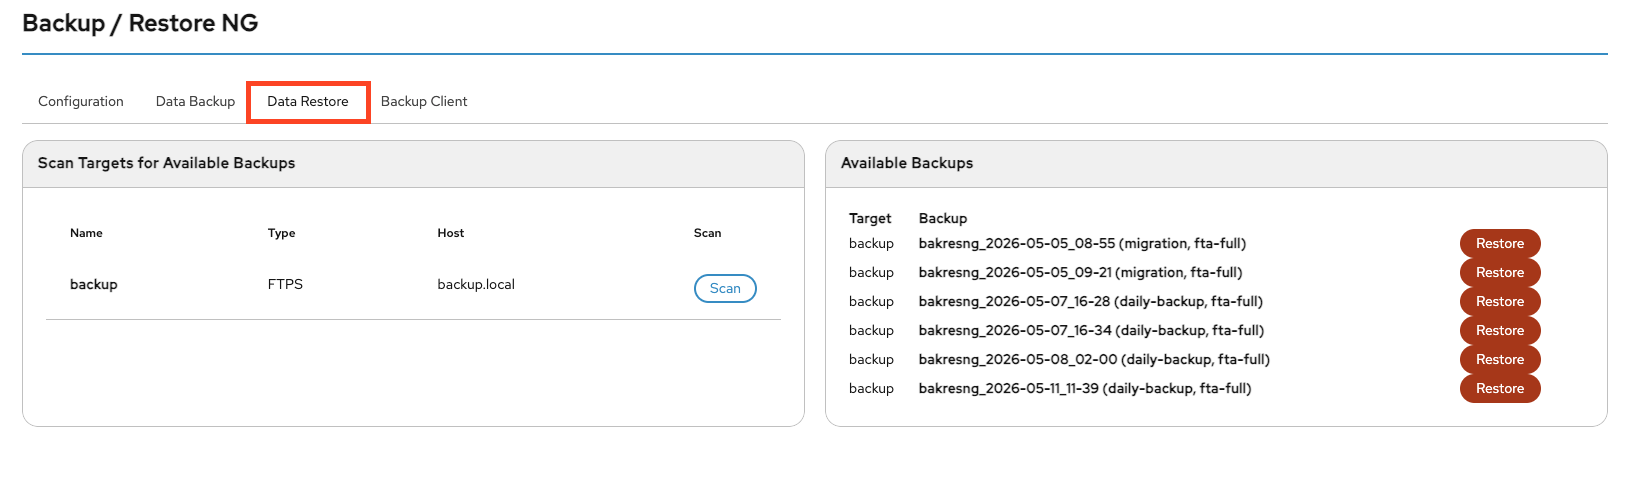
Backup/Restore
You can scan your configured backup targets for available backups by clicking the Scan button.
If backups are available, they can be restored by clicking Restore on the right side.
Each backup entry contains information about the timestamp, the associated backup job, and the included backup data.
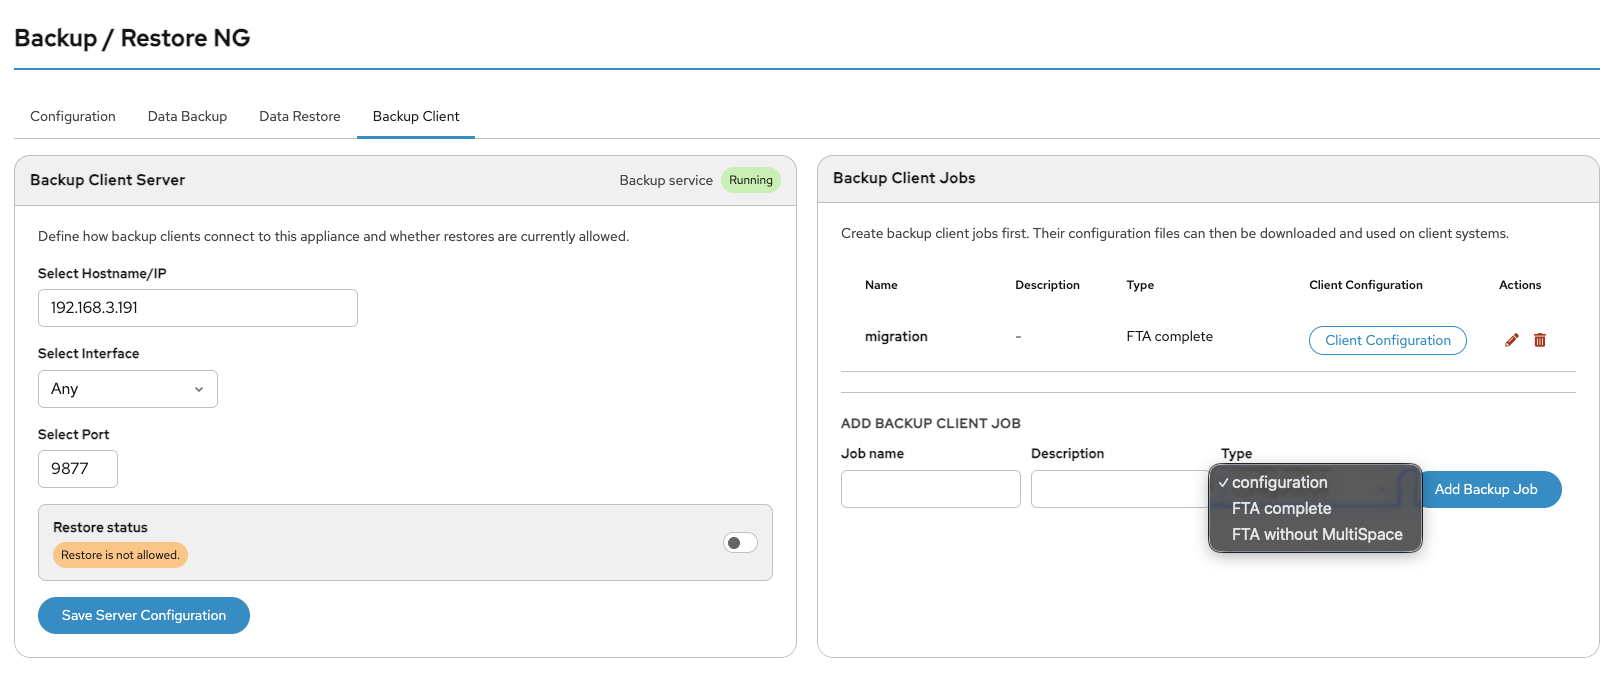
Backup Client
On this page, you can configure a backup client by selecting the port and network interface connected to the target host. You can also enable restore functionality if required. By default, restore access is disabled.
This service is only available if a corresponding client job is configured. The used default port is 9877, but this can be changed in the DOMOS WebUI.
Afterwards, create a backup job by defining a job name and selecting the backup type:
- DOMOS Configuration
- FTA Complete
- FTA without MultiSpace
Backup Client Server
This page displays the current backup server configuration.
It is important that the correct hostname is configured. The hostname is automatically imported from the network settings, so manual configuration is usually not required.
You can also restrict the network interfaces on which the backup server listens. By default, the server listens on all available interfaces.
The final option on this page is the port configuration. By default, the backup server uses port 9877/TCP.
Please note that after changing the hostname/IP address or the port number, all client configuration files must be downloaded again. Otherwise, clients will no longer be able to connect to the backup server.
Backup Client Jobs
Before a connection via the backup client is possible, a backup job must first be configured.
A separate configuration job should be created for each individual backup client, even if all clients use the same backup data. Each client receives its own automatically generated login credentials within the client configuration file.
Using separate configurations for each client makes it easy to revoke access for a specific client by simply removing the corresponding backup job.
The jobs table displays all configured client jobs:
- Name — Name of the backup job
- Description - Description of the backup job
- Type — Type of backup
- Client Configuration — Button to download the client configuration
- Edit — Edits the selected job entry
- Del — Deletes the selected job entry
The client configuration contains automatically generated client-specific login credentials as well as the server connection details.
Information about which data is backed up or restored is stored exclusively on the DOMOS system itself.
On the same page, you can download the backup client package for Linux and Windows systems.
Usage of the Backup Client
The backup client is a command-line application that can be used in the same way on all supported operating systems.
After downloading the correct client version for your operating system and the corresponding configuration file, you can start a backup using the following command:
bakresclient -config PATH-TO-CONFIGFILE -bakdir BACKUP-DIRECTORY
By default, a logfile named bakresngclient.log is created in the current working directory.
Please check the logfile to verify that the backup process completed successfully.
In the same way, you can restore your DOMOS system using the backup client. Please note that restore functionality must first be enabled in the WebUI.
bakresclient -config PATH-TO-CONFIGFILE -resdir DIRECTORY-TO-RESTORE
The backup client provides several command-line options to configure the backup and restore process. All options start with a single dash.
| Option | Description |
|---|---|
-config | Path and filename of the job configuration downloaded from the DOMOS WebUI |
-bakdir | Directory where the backup should be stored. The directory is created automatically if required |
-resdir | Path to the backup directory that should be restored. Restore functionality must be enabled in the DOMOS WebUI |
-logfile | Path and filename of the client logfile |
-loglevel | Log level from 0 (no logging) to 7 (maximum logging). Default value is 4 |

SNMP
SNMP Configuration
SNMP is typically used for monitoring the system from external monitoring tools.
This page lets you configure SNMP versions, system identification details, interfaces, and access settings.
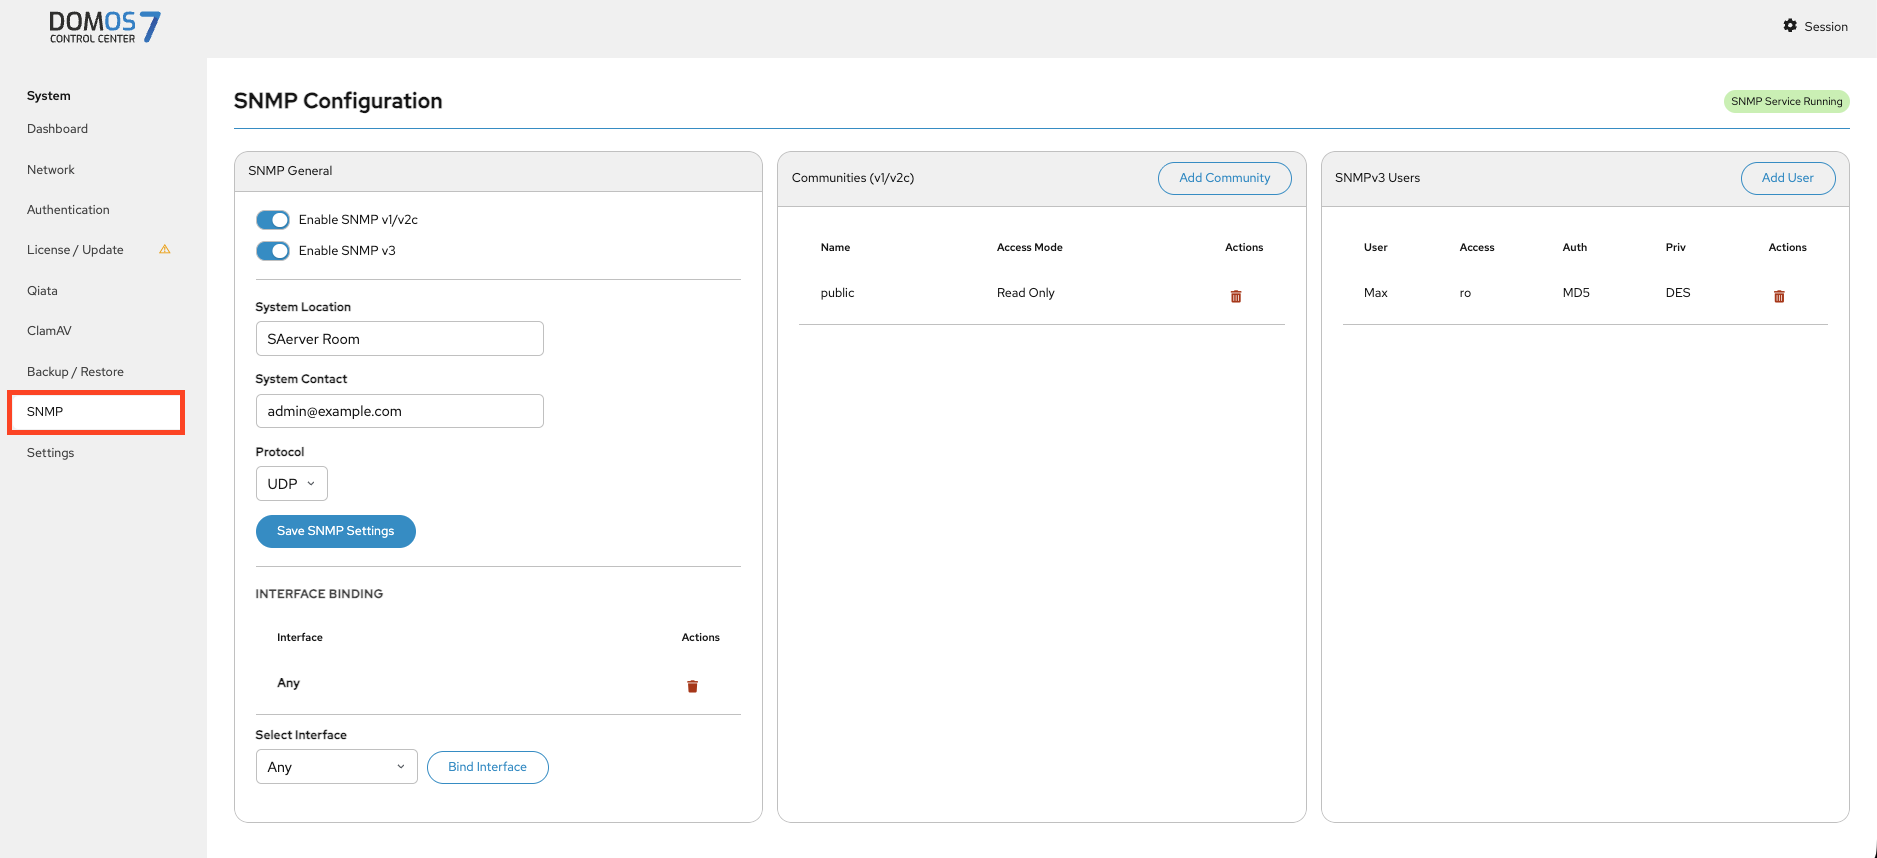
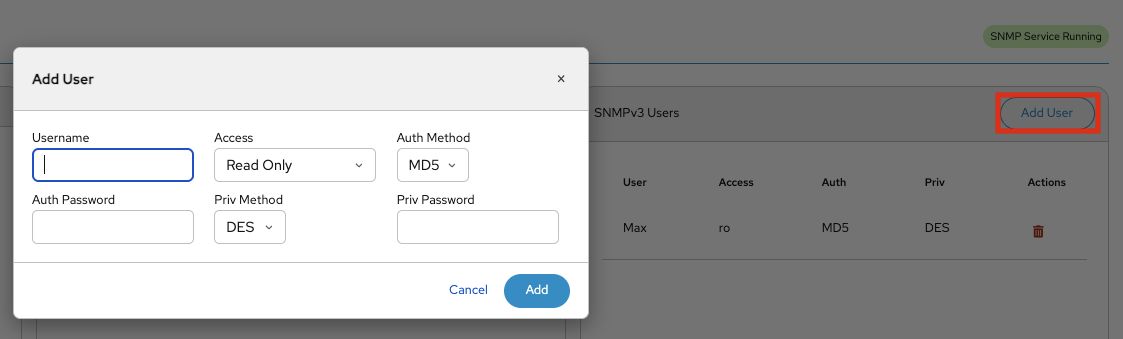
SNMP User
This page lets you add an SNMPv3 user by defining username, access level, and authentication settings.
Settings
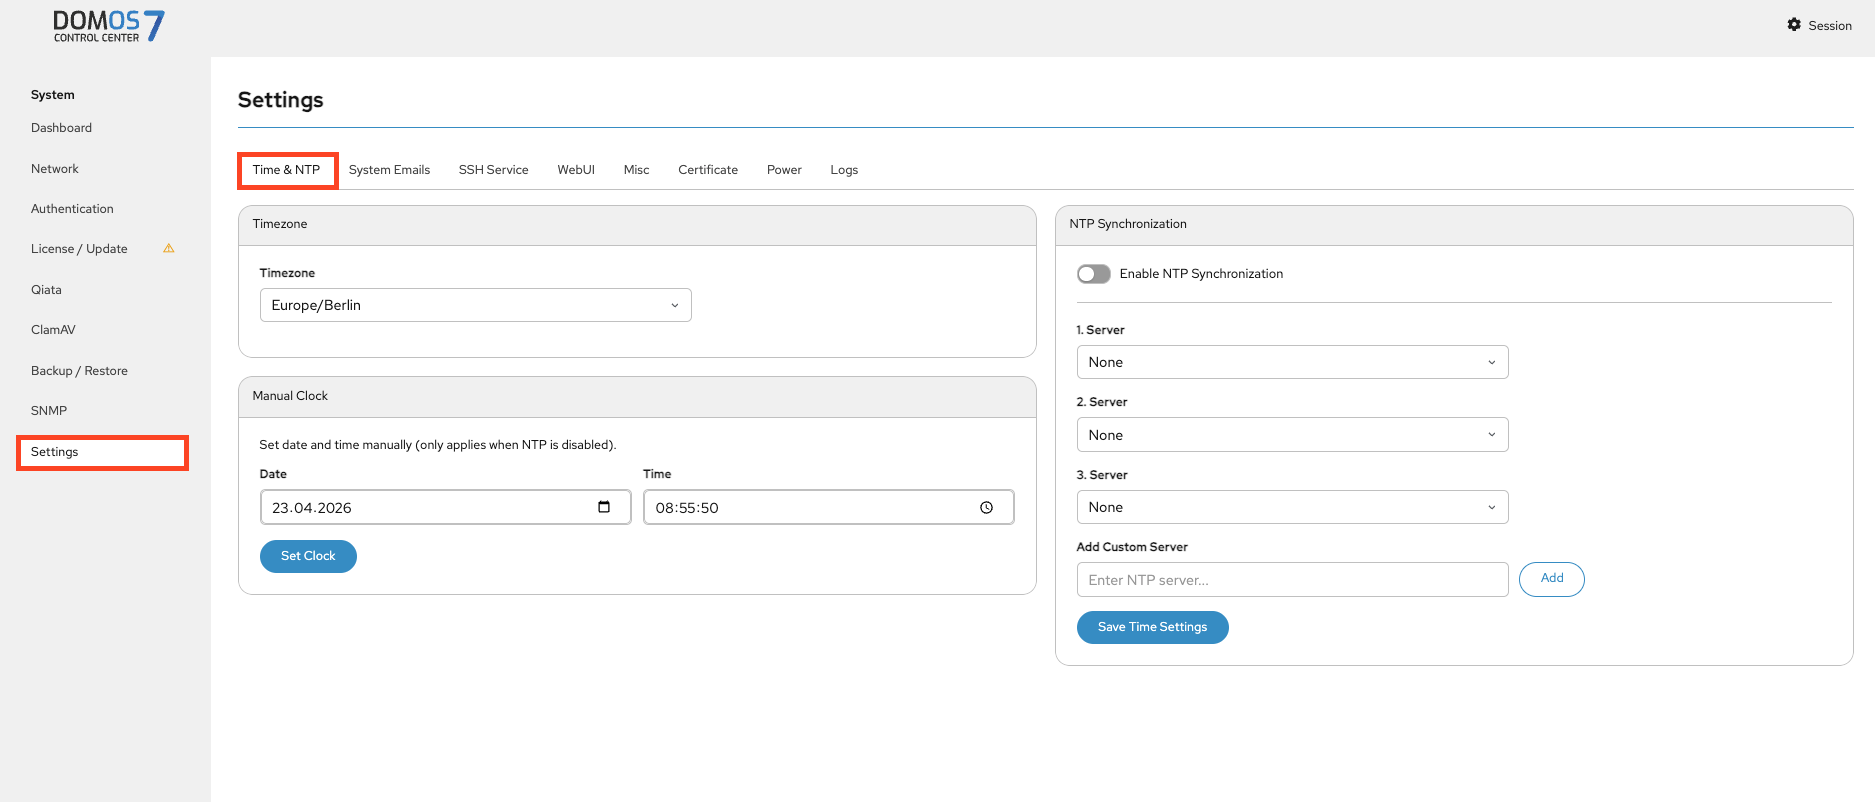
Time & NTP
This page lets you configure timezone, system time, or enable NTP synchronization. If you want to synchronize the time and date via Network Time Protocol (NTP) you can select your NTP Servers here. By default, NTP is deactivated.
System Emails
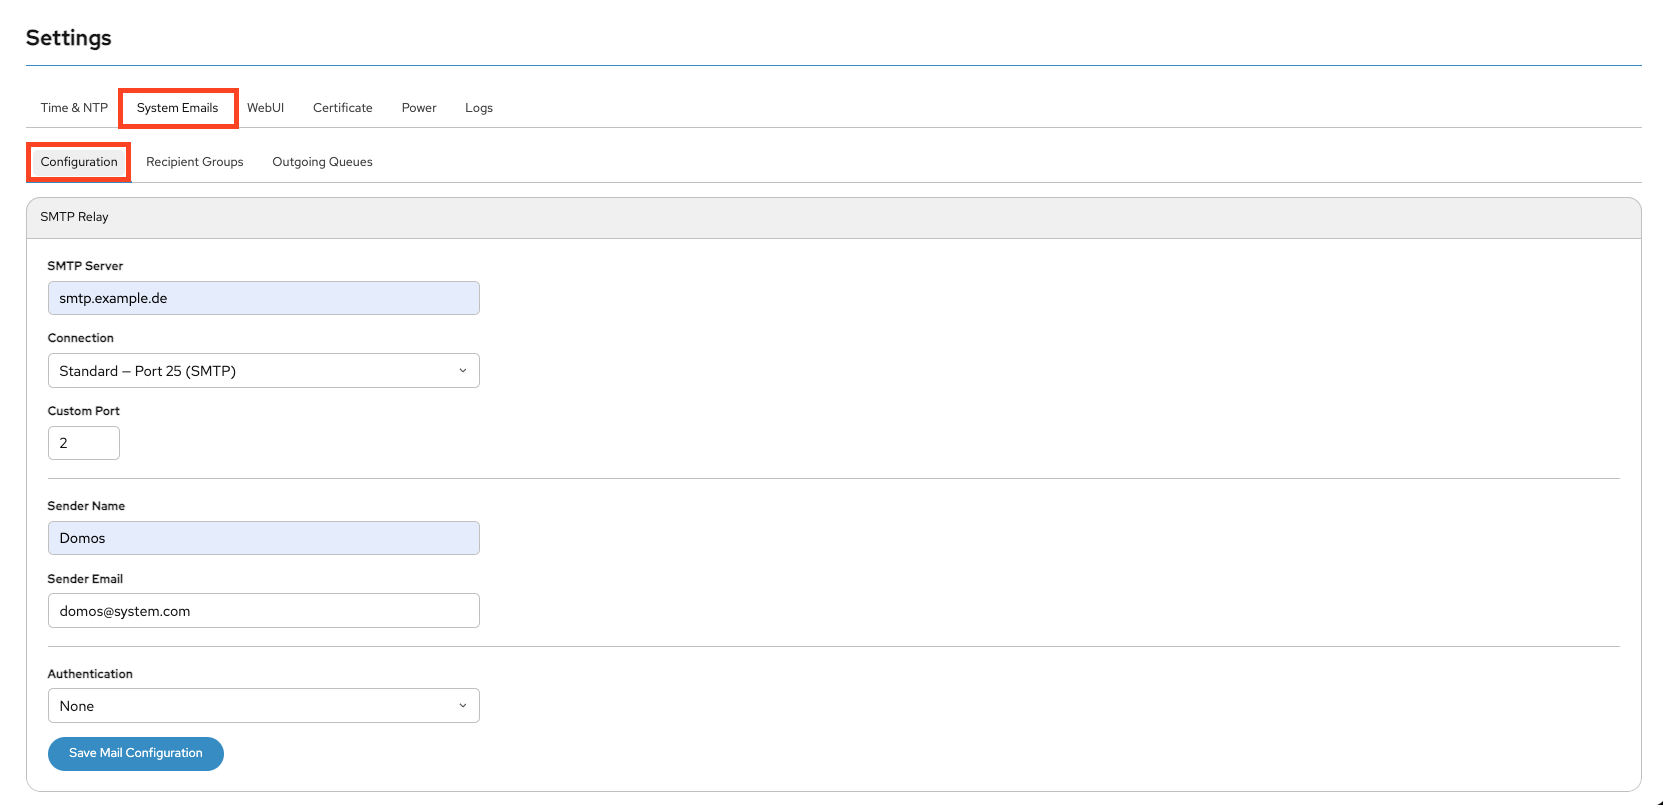
Configuration
This page lets you configure SMTP settings for system notifications.

Microsoft 365 Authentication
If you want to use Microsoft 365 for Authentication, follow the next steps.

If required, a proxy can be optionally defined.
After the form has been successfully saved, you can retrieve the initial token on the following page. To do this, you need to click on the Get Token button.
Please note that SSO by Microsoft is possible here. So if you are logged in to the browser with an SSO enabled account, this will be used to collect the token. If this is not desired, please open a new browser or use the "InPrivate" functionality. From there, a fresh login to Microsoft can be performed with a different user.
Use the Client ID, Tenant ID and Token Endpoint from your Azure App and paste the information into the form in DOMOS as seen. The username is the one used for sending mail. Click on Save Mail Configuration
To get these Information you have to switch to Microsoft.
Follow Microsoft's instructions to register an application.
Use any name you like. Under "Platform configurations", add a native-client redirect URI for mobile/desktop applications: https://FQDN/page/sys_mail_authoutlooktoken.
Then, add API permissions for SMTP.Send:
- click on API permissions and add a new permission by Add a permission
- choose Microsoft APIs -> Microsoft Graph
- select Delegated permissions
- from there enter SMTP in the search box. Expand the
SMTPpermission, then check theSMTP.Sendcheckbox - click on Add permissions

All necessary details to configure the client in DOMOS, you get in the Overview of your App in Azure.

Copy the Redirect URL and go back to your Azur. Under Authentication (preview) you can add redirect URI's for Mobile and desktop applications.

Paste your redirect URI into the text and save it.

Once the authentication is successfully completed, you will be redirected back to the DOMOS system. The Got Tokens message appears. Now click on Activate Settings to have your settings applied.
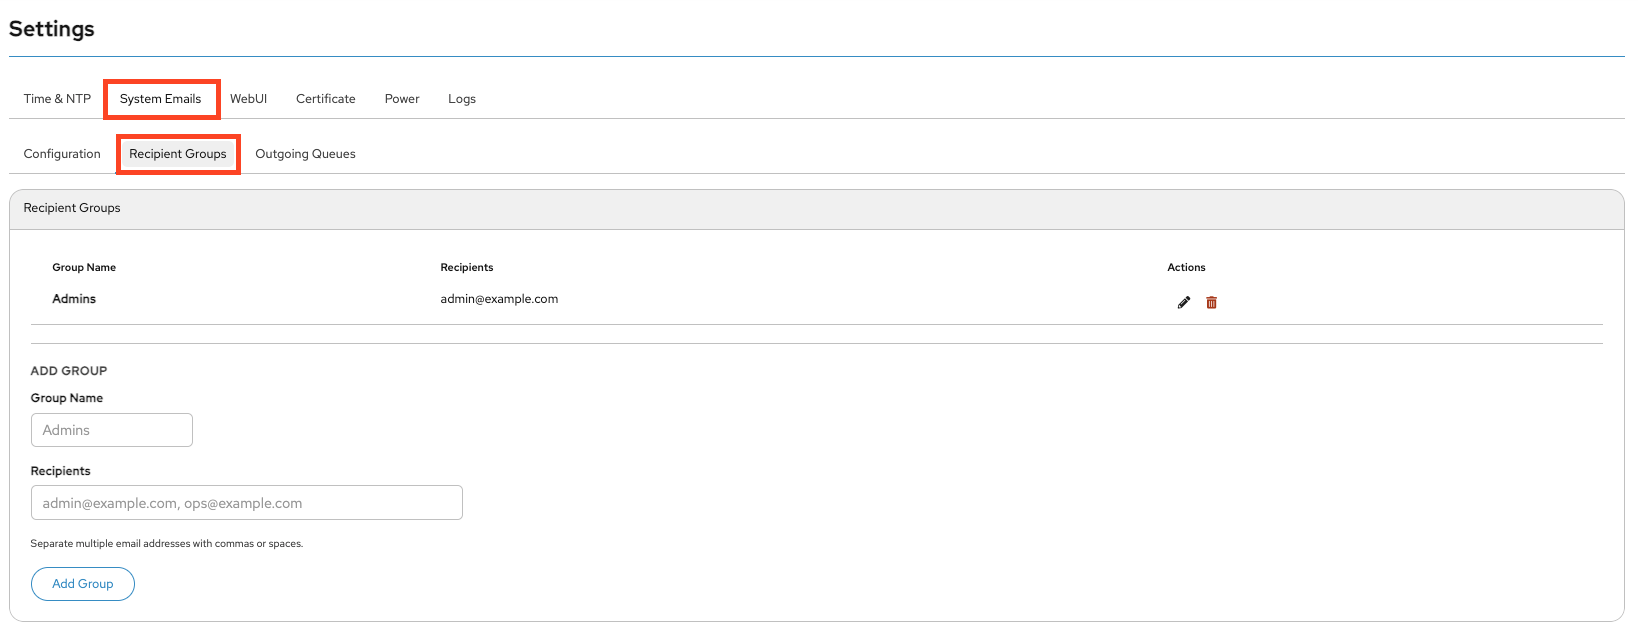
Recipient Groups
This page lets you manage recipient groups for notifications.
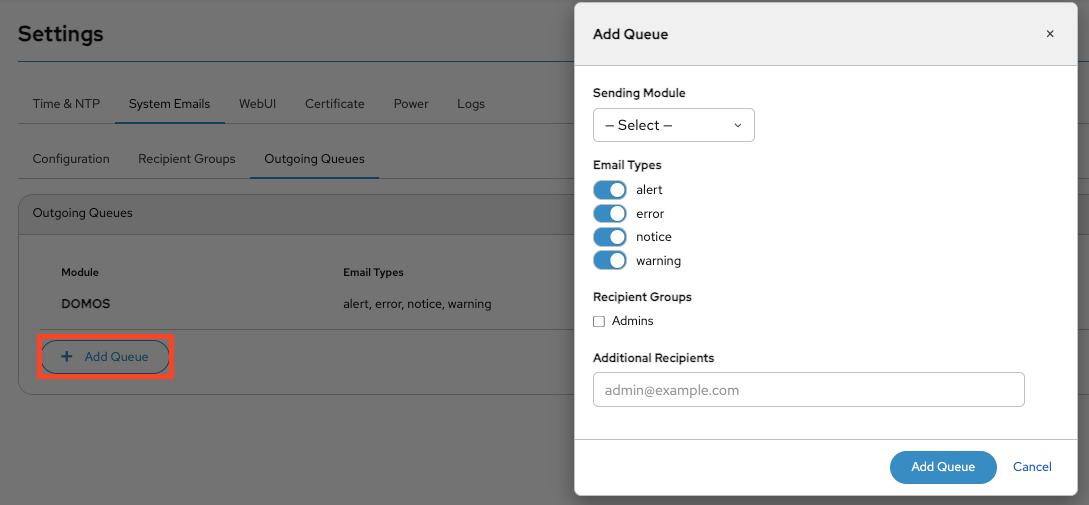
Outgoing Queues
This page lets you configure outgoing email queues by defining message types, modules, and recipients.

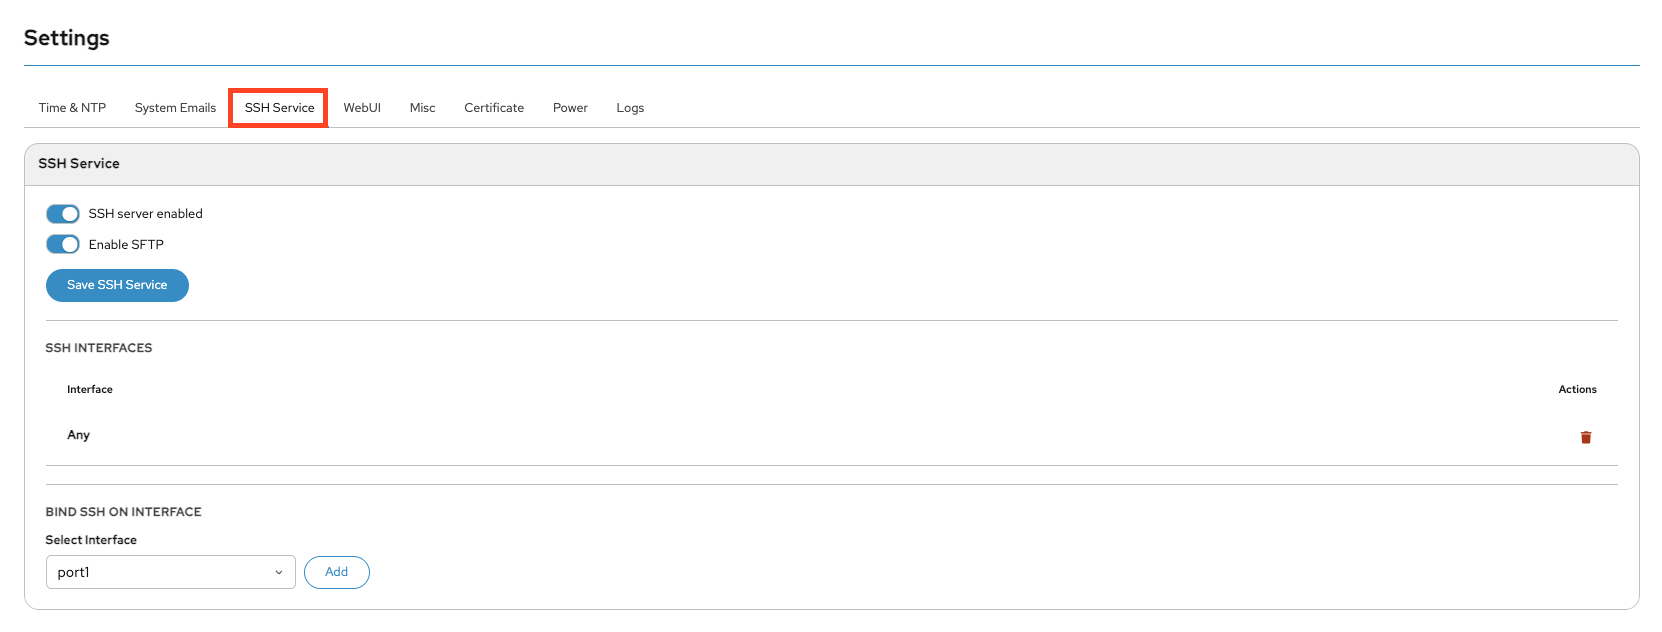
SSH Service
This page lets you enable or disable SSH and SFTP access and define allowed interfaces.
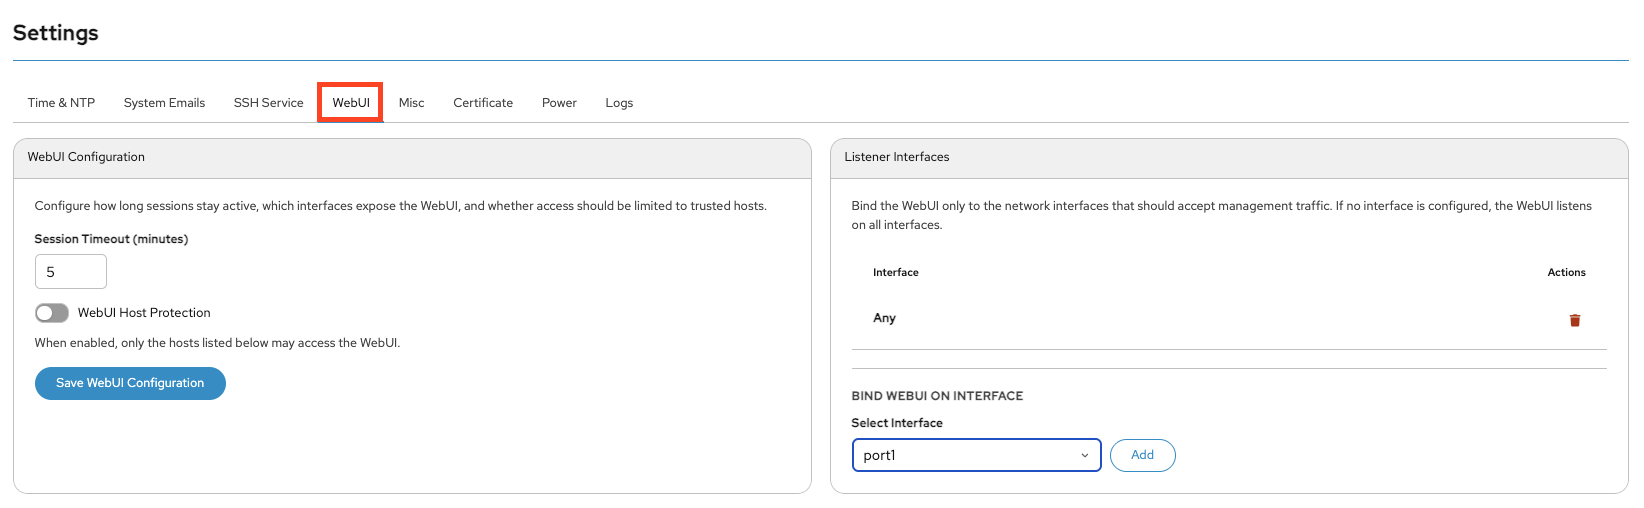
WebUI
This page lets you configure session timeouts, access restrictions, and interfaces.
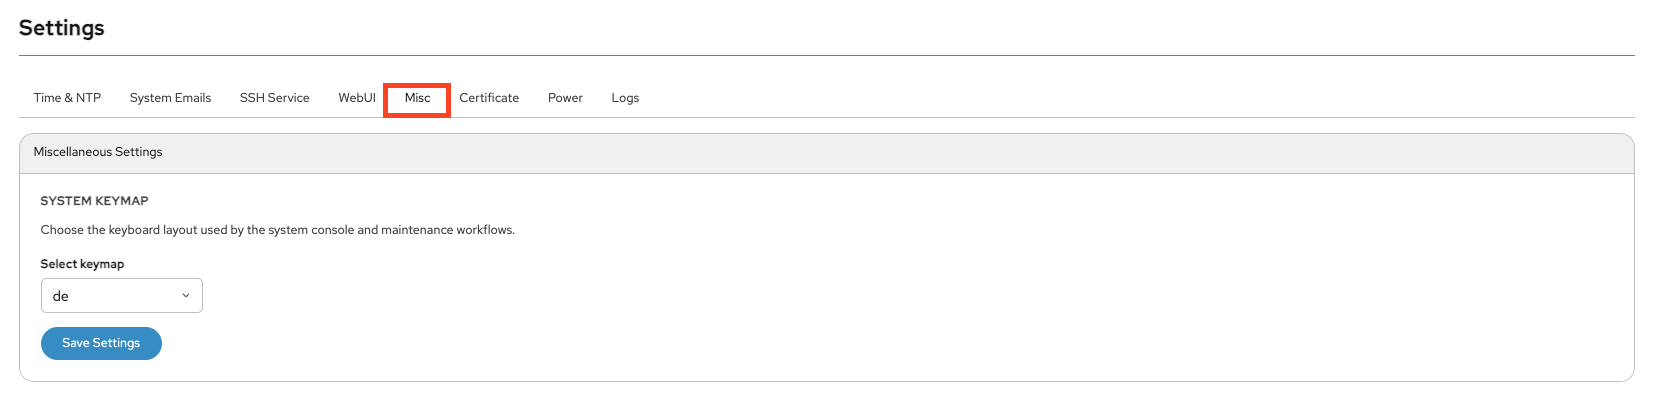
Misc
This page lets you configure miscellaneous system settings such as keyboard layout.
Certificate
The Certificate section in the Settings menu is used to manage the SSL/TLS certificate for the device’s WebUI. SSL certificates secure the web interface by enabling encrypted HTTPS connections between the browser and the device. At the top of the page, the currently installed certificate is displayed. The information shown includes the certificate issuer, as well as the validity period (“Valid from” and “Valid until”). This allows administrators to verify whether the certificate is still valid or if it needs to be renewed or replaced.
The lower section of the page allows a new certificate to be uploaded manually. Three files can be provided:
- Certificate (PEM): The public SSL certificate file in PEM format.
- Certificate Key: The private key associated with the certificate.
- Certificate Chain (optional): Intermediate or CA chain certificates required to establish full trust.
After selecting the required files, clicking Upload Certificate installs the new certificate for the WebUI.
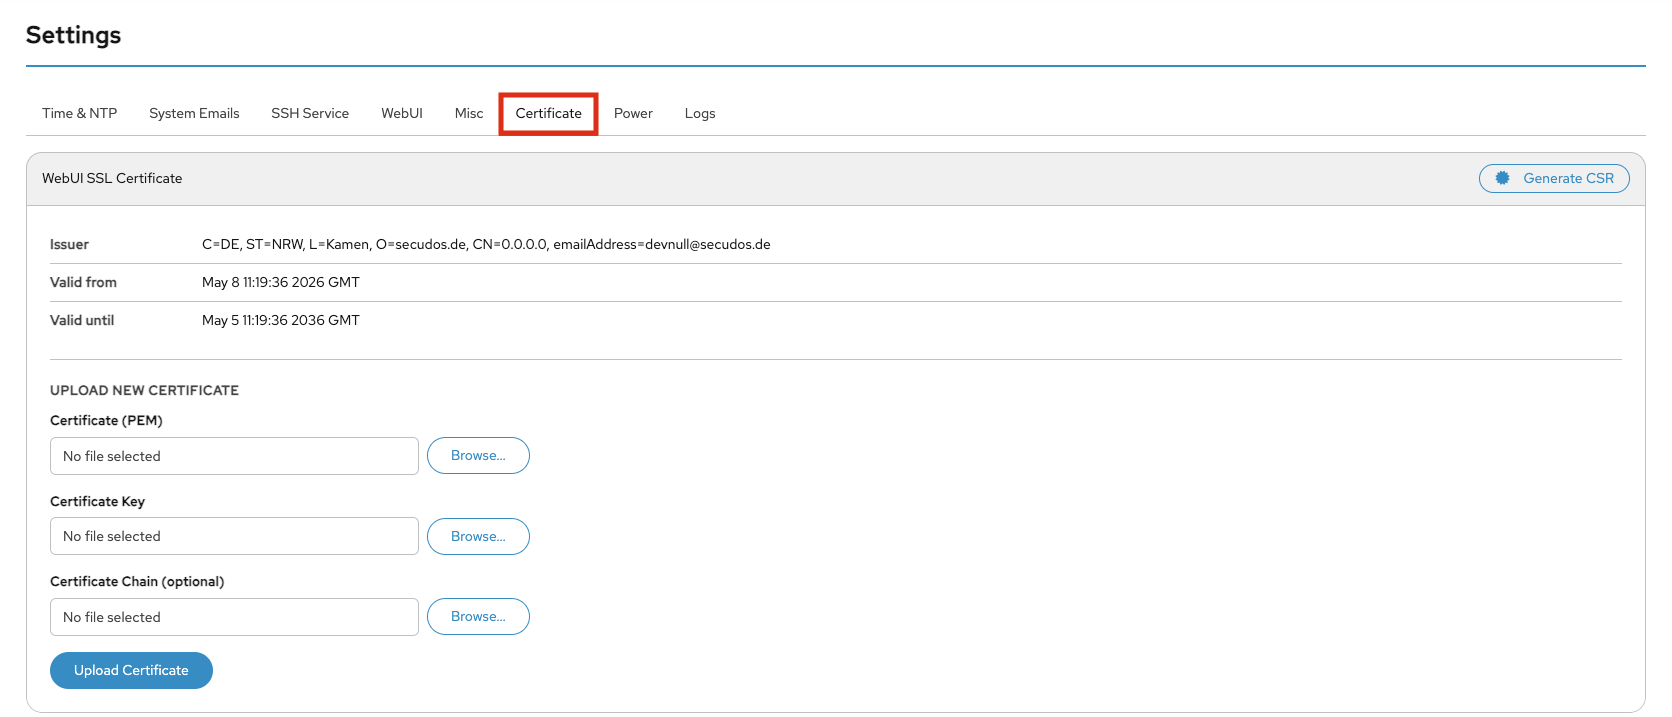
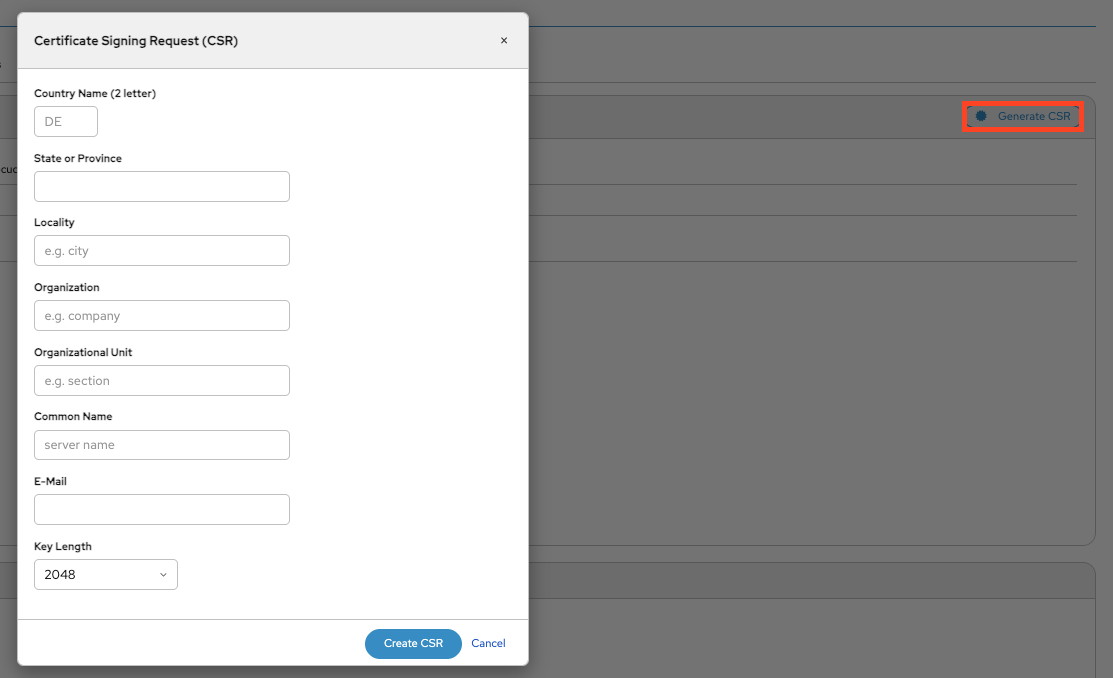
The Generate CSR button can be used to create a Certificate Signing Request (CSR). A CSR is typically required when requesting a signed certificate from a trusted Certificate Authority (CA), such as an internal corporate CA or a public provider.
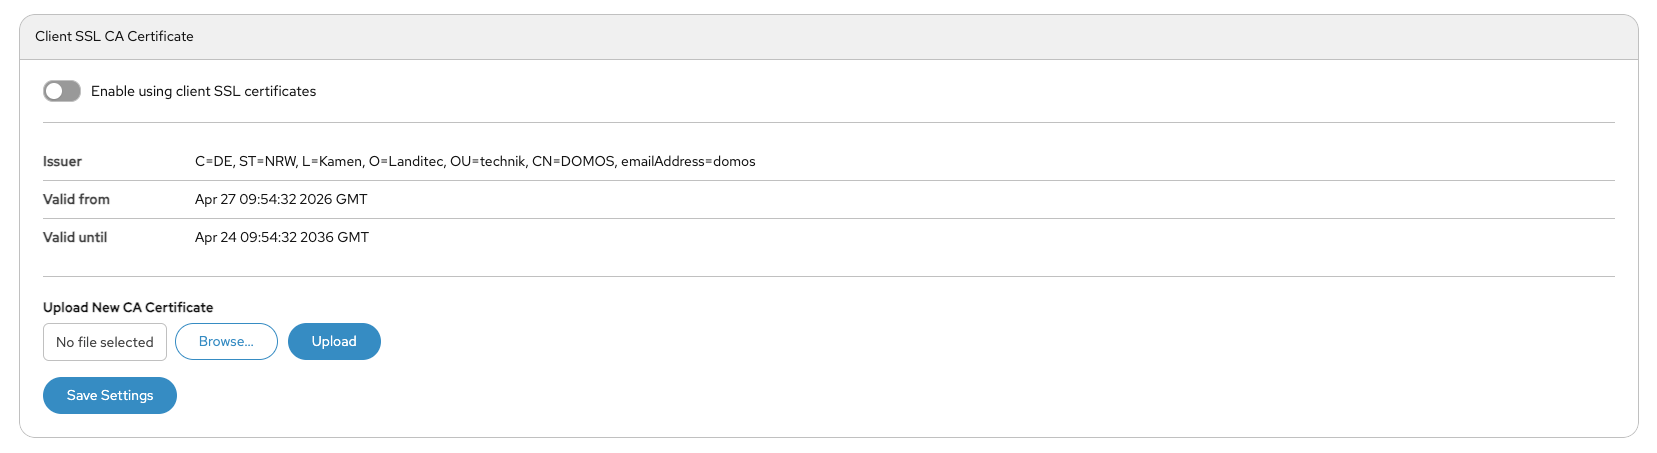
SSL Client
The Client SSL CA Certificate section is used to configure certificate-based client authentication for secure system access. When Enable using client SSL certificates is activated, only clients with trusted SSL certificates signed by the configured Certificate Authority (CA) can access the system. The page displays information about the currently installed CA certificate, including the issuer and validity period. Administrators can upload a new CA certificate using the Upload New CA Certificate section. This certificate is used to verify client certificates during authentication. Clicking Save Settings applies the configuration changes. This feature is typically used to increase security by enforcing certificate-based access control.
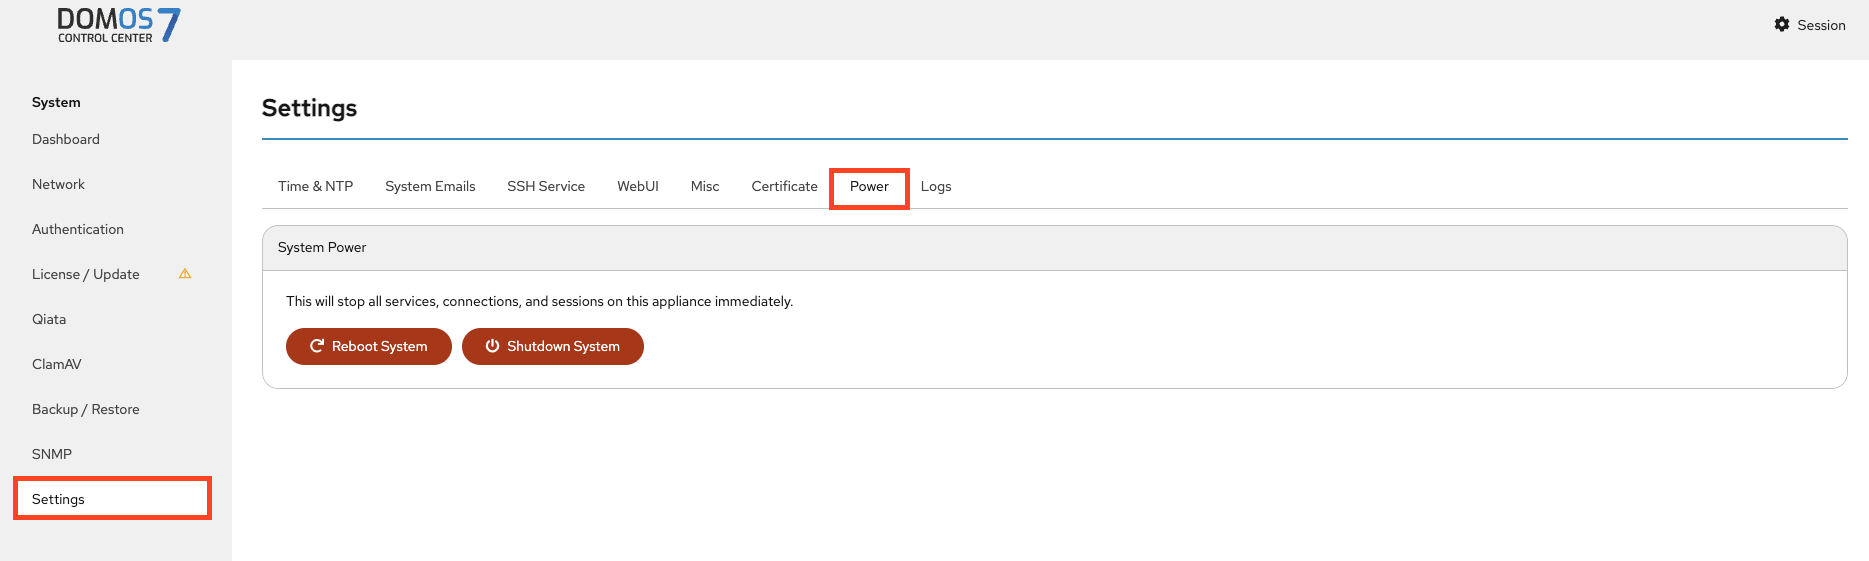
Power
This page lets you safely reboot or shut down the system.
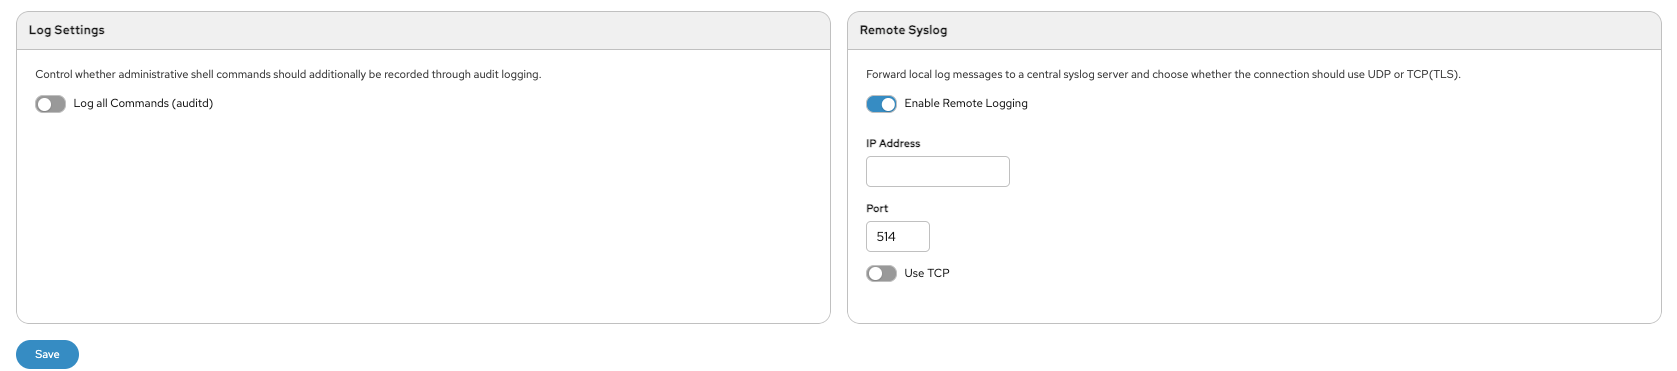
Log
This page lets you view and download system logs.
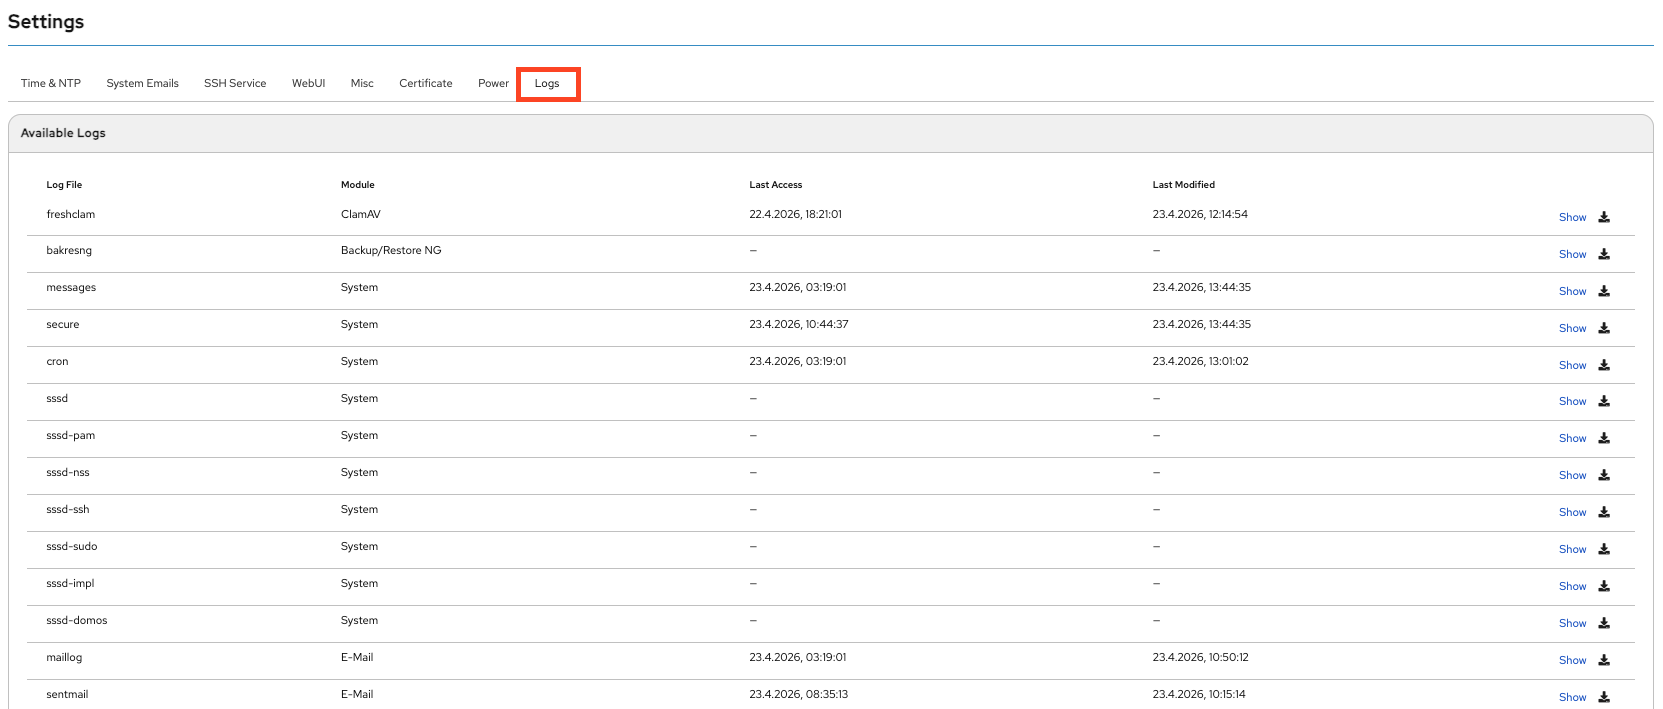
This page also allows you to configure logging, enable audit logs, and forward logs to a remote syslog server.