Connect Exchange
Prepare Qiata to receive emails
Log in to the DOMOS operating system via https://<hostname>:10000. Please note that https is used. <hostname> refers to the hostname or the IP address of the Qiata/DOMOS installation.
Activate Email Interface
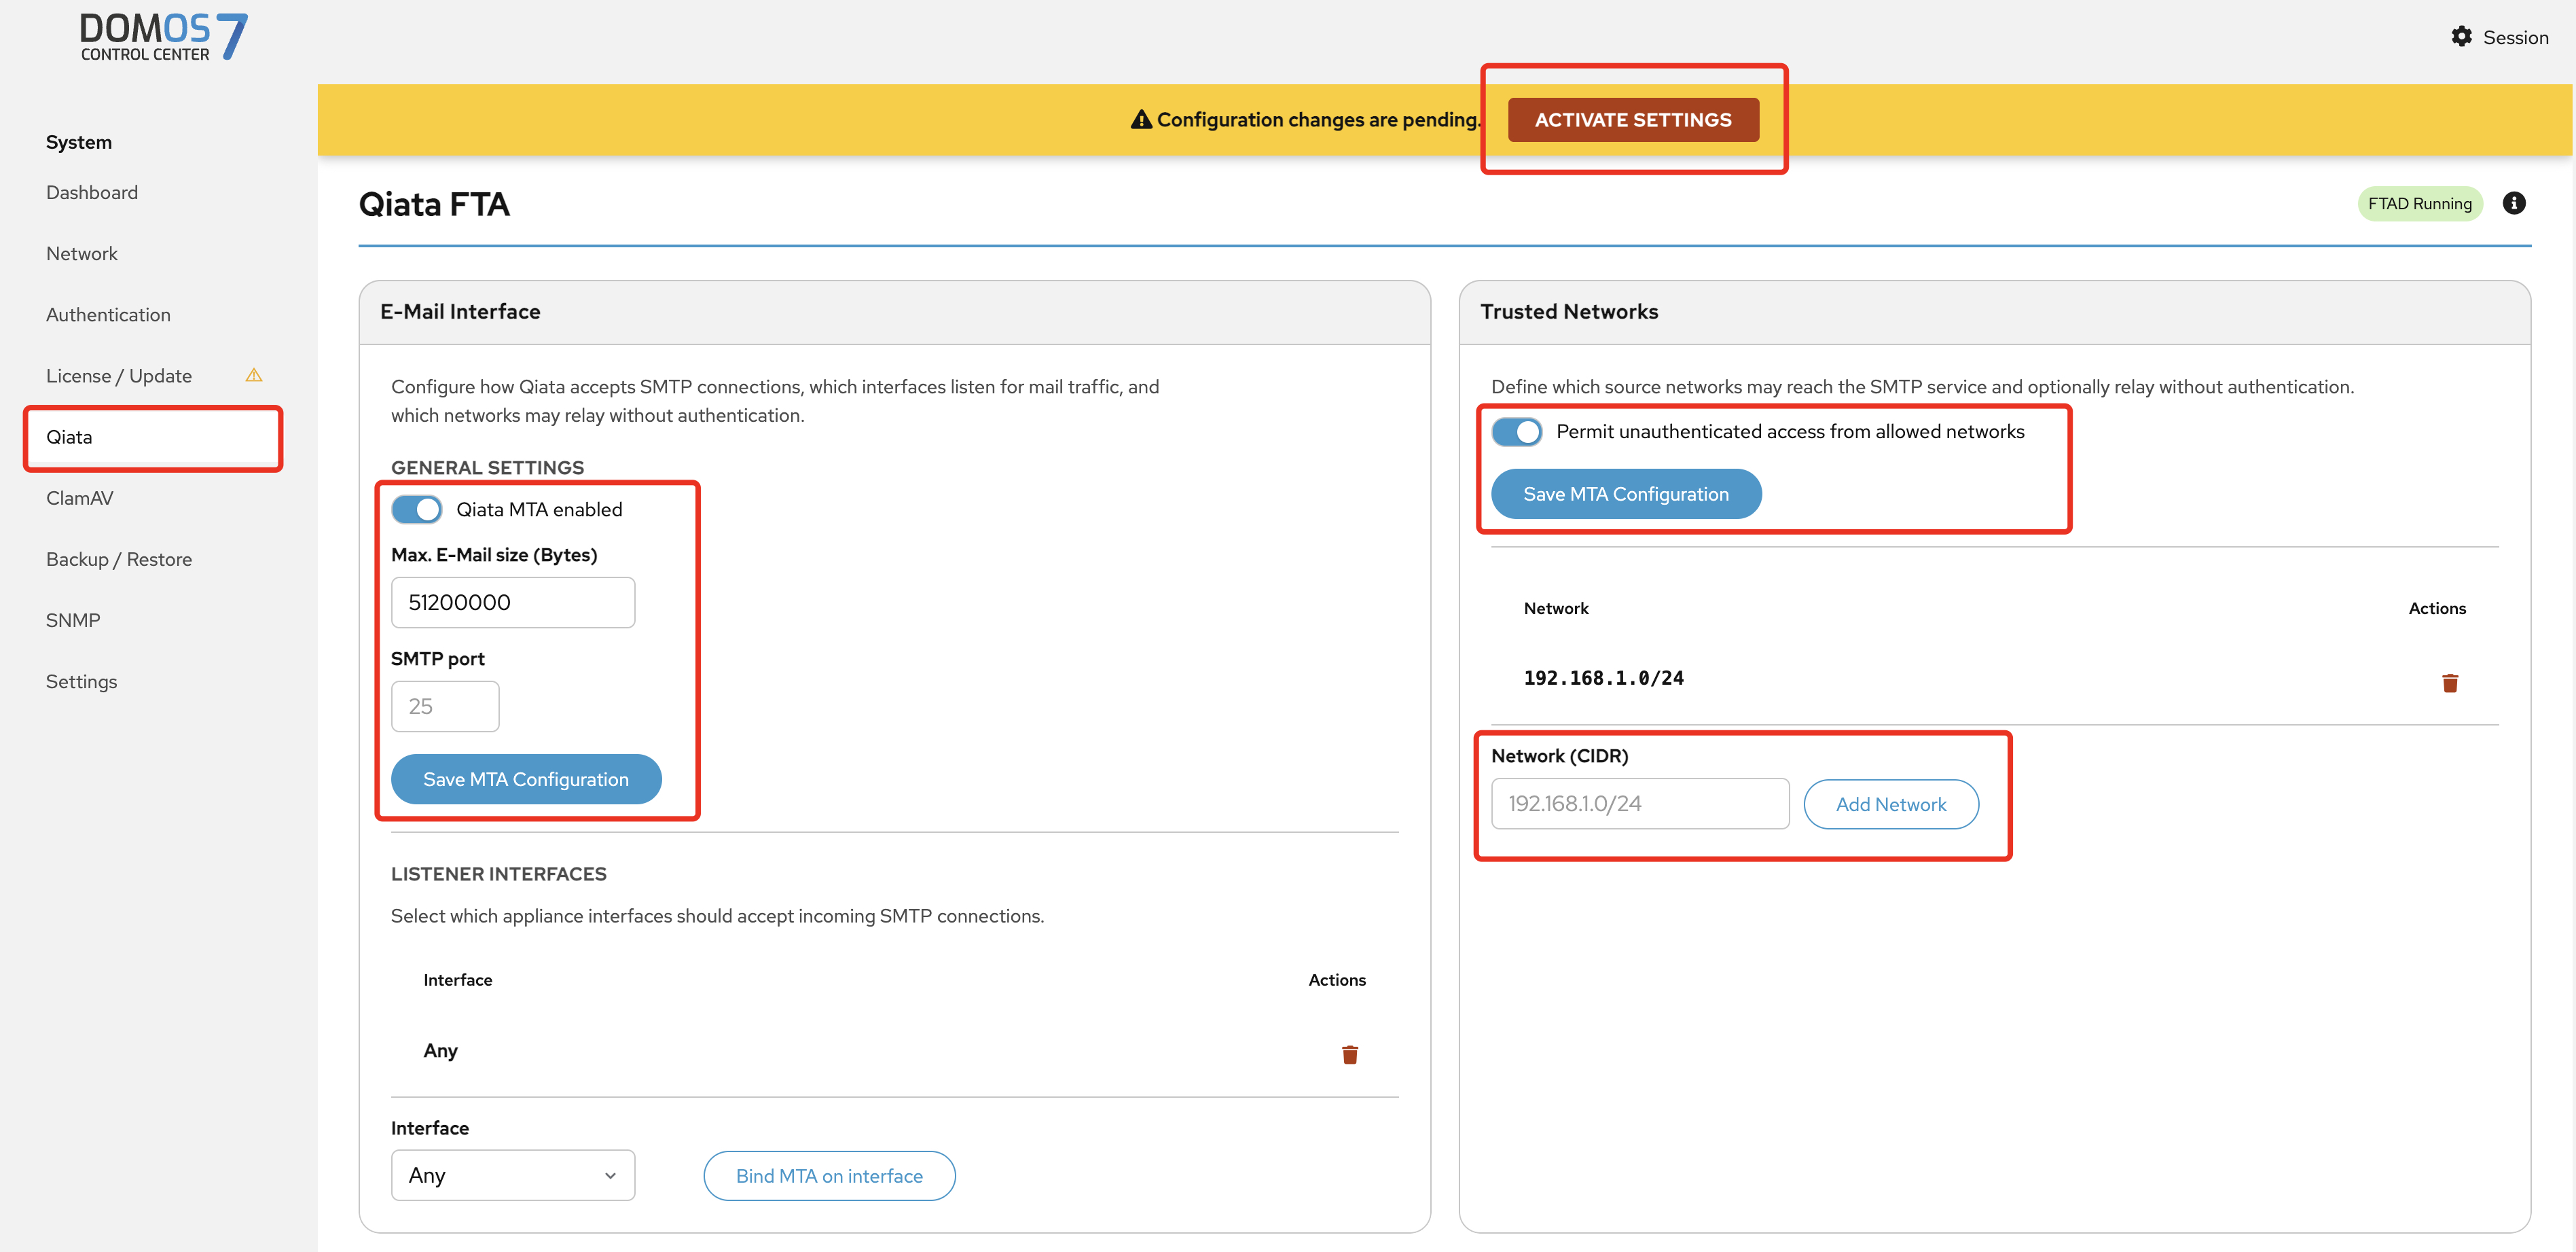
In the DOMOS Control Center (CC), navigate to Qiata → E-Mail Interface.
Enable the Qiata MTA option by setting it to Enabled and configure an appropriate Max. E-Mail Size. This value defines the maximum email size that Qiata will accept.
After completing the configuration, execute Activate Settings in the upper section of the interface and wait until the configuration process has finished.
Allow SMTP Access
After completing the Activate Settings step, use Add Network to define the network range from which the Qiata system should accept SMTP connections.
Access is allowed for the entire configured network range. We strongly recommend using the smallest possible network range to limit unauthorized access.
After entering the network range, click Save. The configured network will then be displayed.
Additionally, enable the option Permit unauthenticated access from allowed networks to allow anonymous SMTP access from the configured networks. This setting is required when operating Qiata together with a Microsoft Exchange Server.
After completing the configuration, click Save and execute Activate Settings again to apply the changes.
Create Exchange-Connector
To decide on the Exchange server that emails above a certain size should be sent via Qiata, an additional send connector can be created with higher costs than the standard send connector. By defining a maximum size in the standard send connector, all emails that exceed the maximum size will then be sent will be sent to the Qiata via SMTP.
If the target system of the standard send connector is not available (e.g. due to maintenance work), emails that do not exceed the maximum size are also sent via Qiata.
Exchange 2010
- Launch Exchange Management Console
- Navigate to Organization Configuration ⇒ Hub Transport ⇒ Send Connectors

Creating the Qiata Send Connector
- Right click in the white area
- Select new send connector

- New Send Connector wizard

- Address space ⇒ Add

-
Network Settings ⇒ Add ⇒ Route email through the following smarthosts:
Store IP address of Qiata

- Smarthost authentication settings: no change.
- Source server: no change
- New connector:

Customizing the default send connector
- Double click on the default send connector (in this example: IronPort).
- Source server: Enter the desired maximum message size under Maximum message size.

Exchange 2013/2016
- Start Exchange Admin Center
- Navigate to Message Flow ⇒ Send Connectors

Creating the Qiata Send Connector
-
Click on New (+)
-
New send connector

-
Network Settings ⇒ Forward Email via Smarthosts
Add (+)
Store IP address of the Qiata

-
Smarthost authentication settings: no changes
-
Address space
Add (+)
For the cost, make sure that it is greater than the cost of the standard send connector.

-
Source server:
Add (+)
Select Exchange server
Finish
Customizing the default send connector
Customizing the default send connector
- Double click on the default send connector (in this example: SMTP_external)
- Enter the desired maximum message size under Maximum size for sent message (MB)

Exchange Online
- Start Exchange Online Admin Center
- Navigate to message flow => Connectors

Creating the Qiata Send Connector
- Click on Add a connector (+)

-
Select the messaging scenarios. Emails are forwarded via Office 365 to Qiata (your organization's email server).
-
Choose an appropriate name and description for your connector. And choose Turn it on + Retain internal Exchange email headers.

- Select the second option to bind the connector to a specific rule (in our example, if the file is larger than 10MB). Only if this rule is true, the new connect will be used.

- Enter the routing Domains. Enter the FQDN or IP of the Qiata system in the input mask and click on (+). Afterwards click on Next

- Select Always TLS. The following steps perform a check of the connector, which you must perform to save the connector. Note that this test will not work normally, but is mandatory for saving. After the test fails, save the new connector.

Add customized rule
- Now switch to the "Rules" tab and add a new rule via the "+". Select "Filter messages by size..." from the list.

- Now create the desired rule for sending via Qiata. In our case all files with "The message size is greater than or equal to..." 9.77MB, will automatically be sent via the Connector you just created, i.e. via Qiata. You can freely choose the size and rules here. Save the new rule afterwards.

Test the Connection now by sending a file bigger then 10MB via your Mail-Client.