Qiata Quickstart Guide
Initial configuration
This guide walks you through the initial configuration of your new Qiata system. The basic steps required for operation are explained here. However, Qiata provides many additional features and configuration options. Detailed information about all Qiata features can be found in the documentation.
Install your Software Appliance
- Download the latest ISO file from our website: https://www.secudos.de/en/downloads
- Create a virtual machine for the appliance.
System Requirements
Disk
- Minimum size: 10 GB
- Use either VirtIO or VirtIO SCSI as the disk controller
Memory
- Minimum:
4096 MBRAM - More memory is recommended depending on system usage
- Memory ballooning is supported
CPU
- Requirement: 64-bit x86 processor with support for the x86-64-v3 architecture, including the AVX2 instruction set
- Proxmox: Use
x86_64_v3if the hardware platform is sufficiently modern - Hyper-V: Current versions are compatible by default
Network
- At least one network interface is required
- Use VirtIO-Net as the network adapter type
- A static MAC address is required
More resources are recommended.
-
Ensure that you boot from the CD image (ISO) supplied by SECUDOS. Perform a plain installation from the CD image without applying any changes from the virtual hosting software (e.g. setting an IP address during the installation). Please avoid using templates provided by your virtualization software. The installation will start automatically after a few moments.
The setup does not require any input or interaction. Once the setup procedure has completed, the virtual appliance will restart.
Please note that the Secure Boot feature must be disabled for the virtual machine.
Supported Virtualization Platforms
| Hostsystem | Minimal Version |
|---|---|
| VMware | ESXi 7.0 Update 3 |
| Hyper-V | Windows Server 2019 (Gen 2 recommended) |
| Linux | Qemu 6.2+ |
Configure DOMOS
Open your preferred browser and log in to DOMOS (the operating system) by entering the default IP address 192.168.2.1:10000 or your customized IP address.
You can change the IP address of the system at any time using the DomosNetConf tool from the system command line.
Log in using the default credentials:
Username: admin
Password: admin
During the initial DOMOS configuration, you must configure both an IP address and a default gateway.
Change IP Address
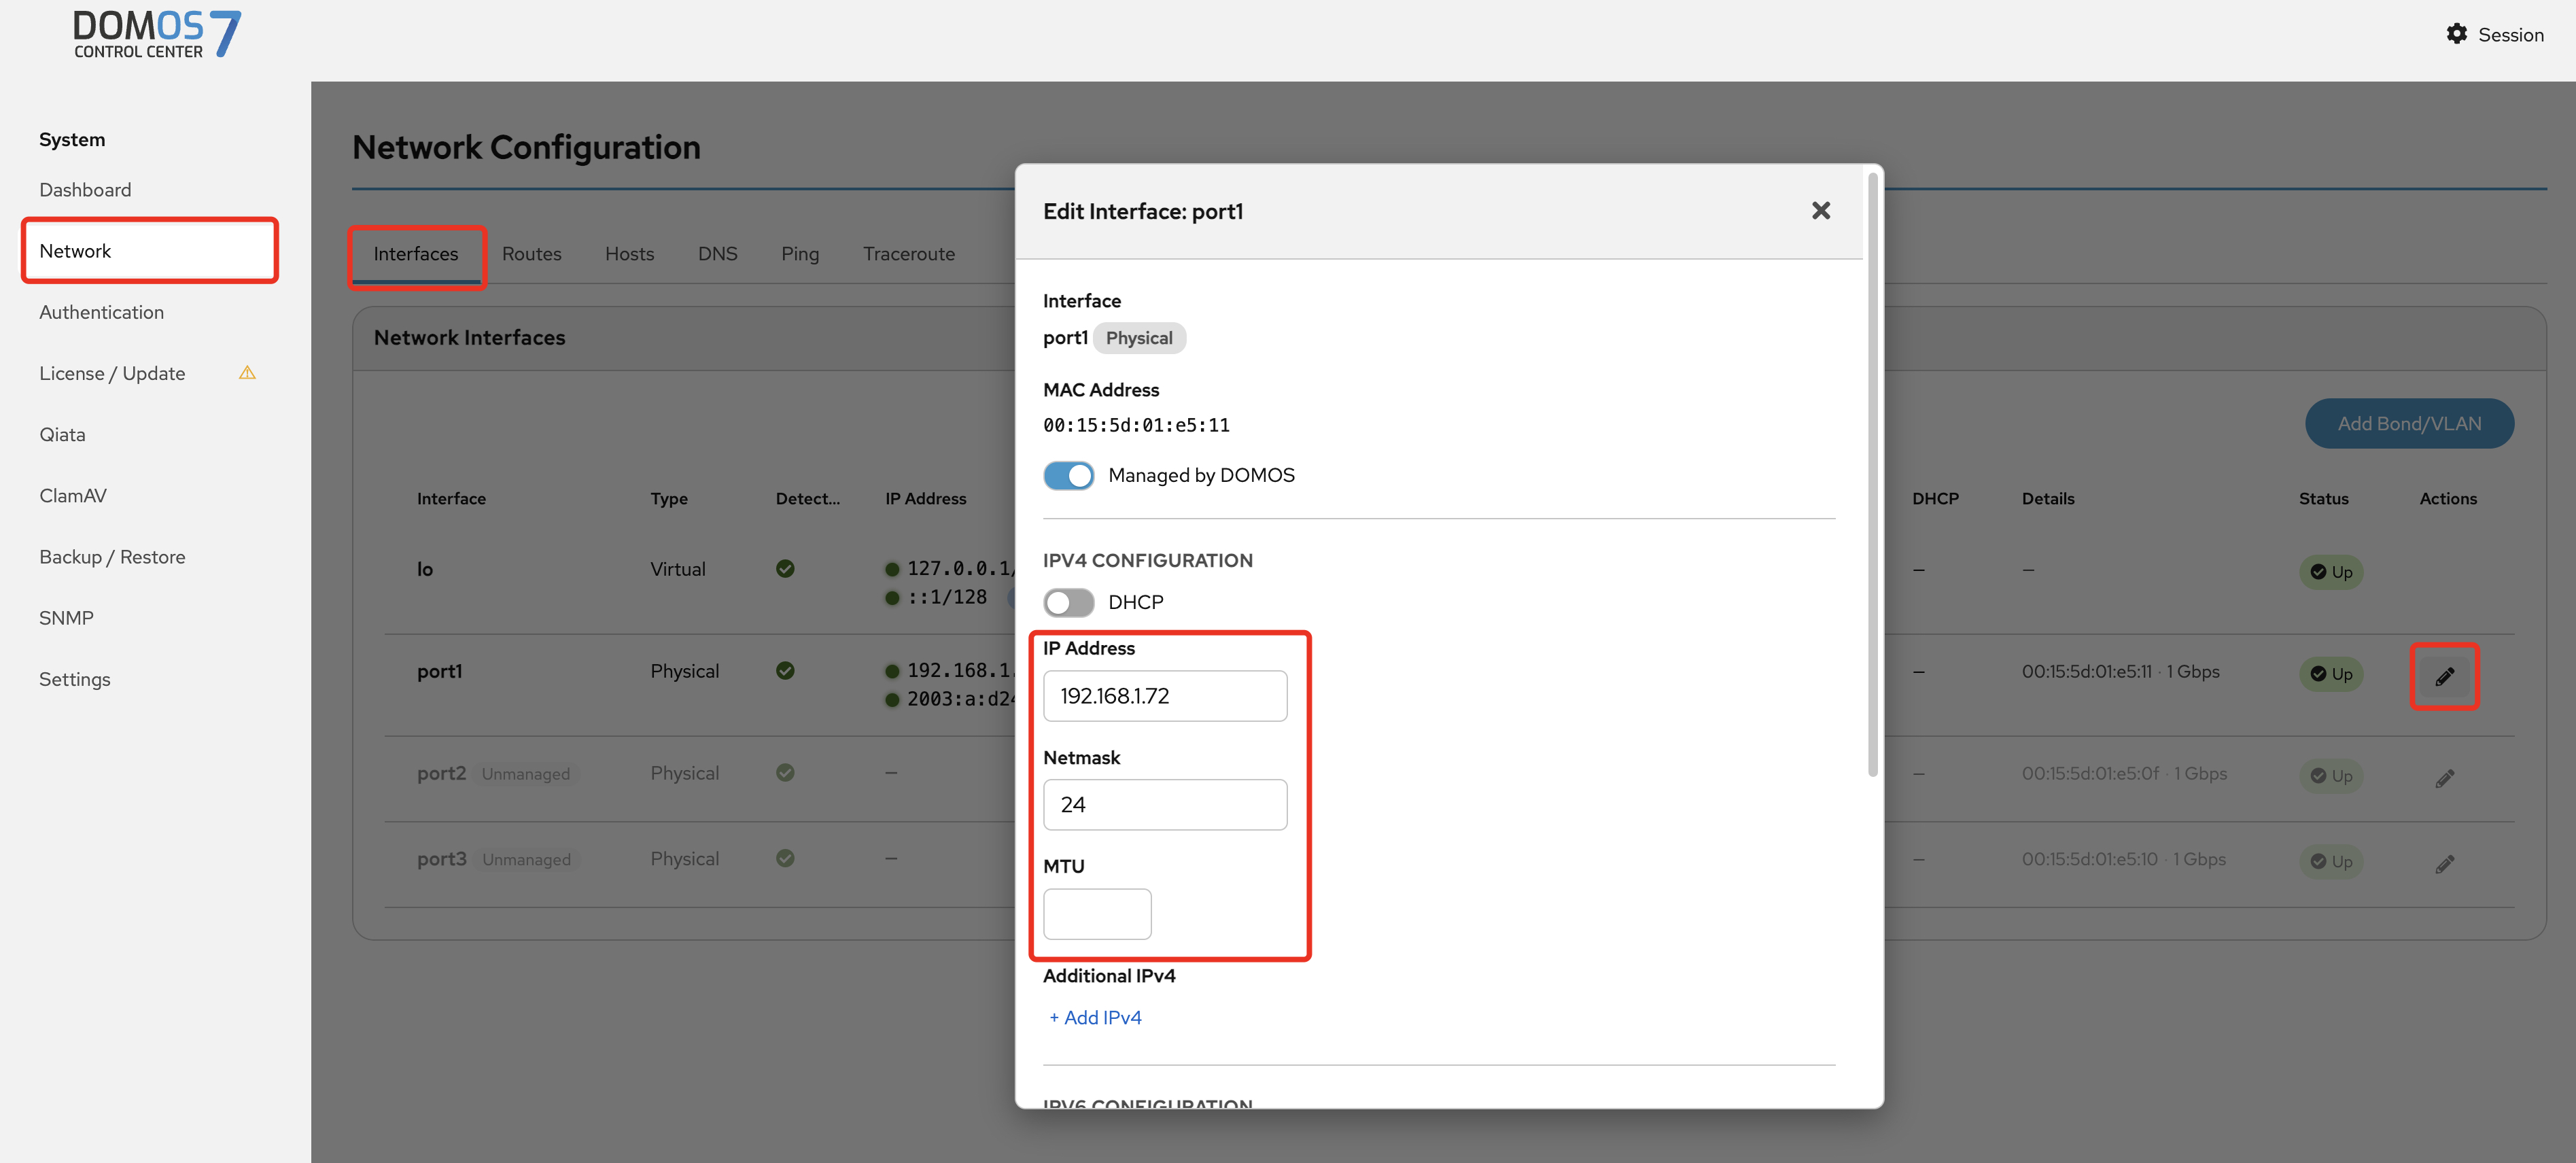
- In the navigation bar, select "Network" → "Interfaces" and click "Edit" on the desired interface. [OPTIONAL]
- Configure the required network settings and click on "Save".
Set Default Gateway
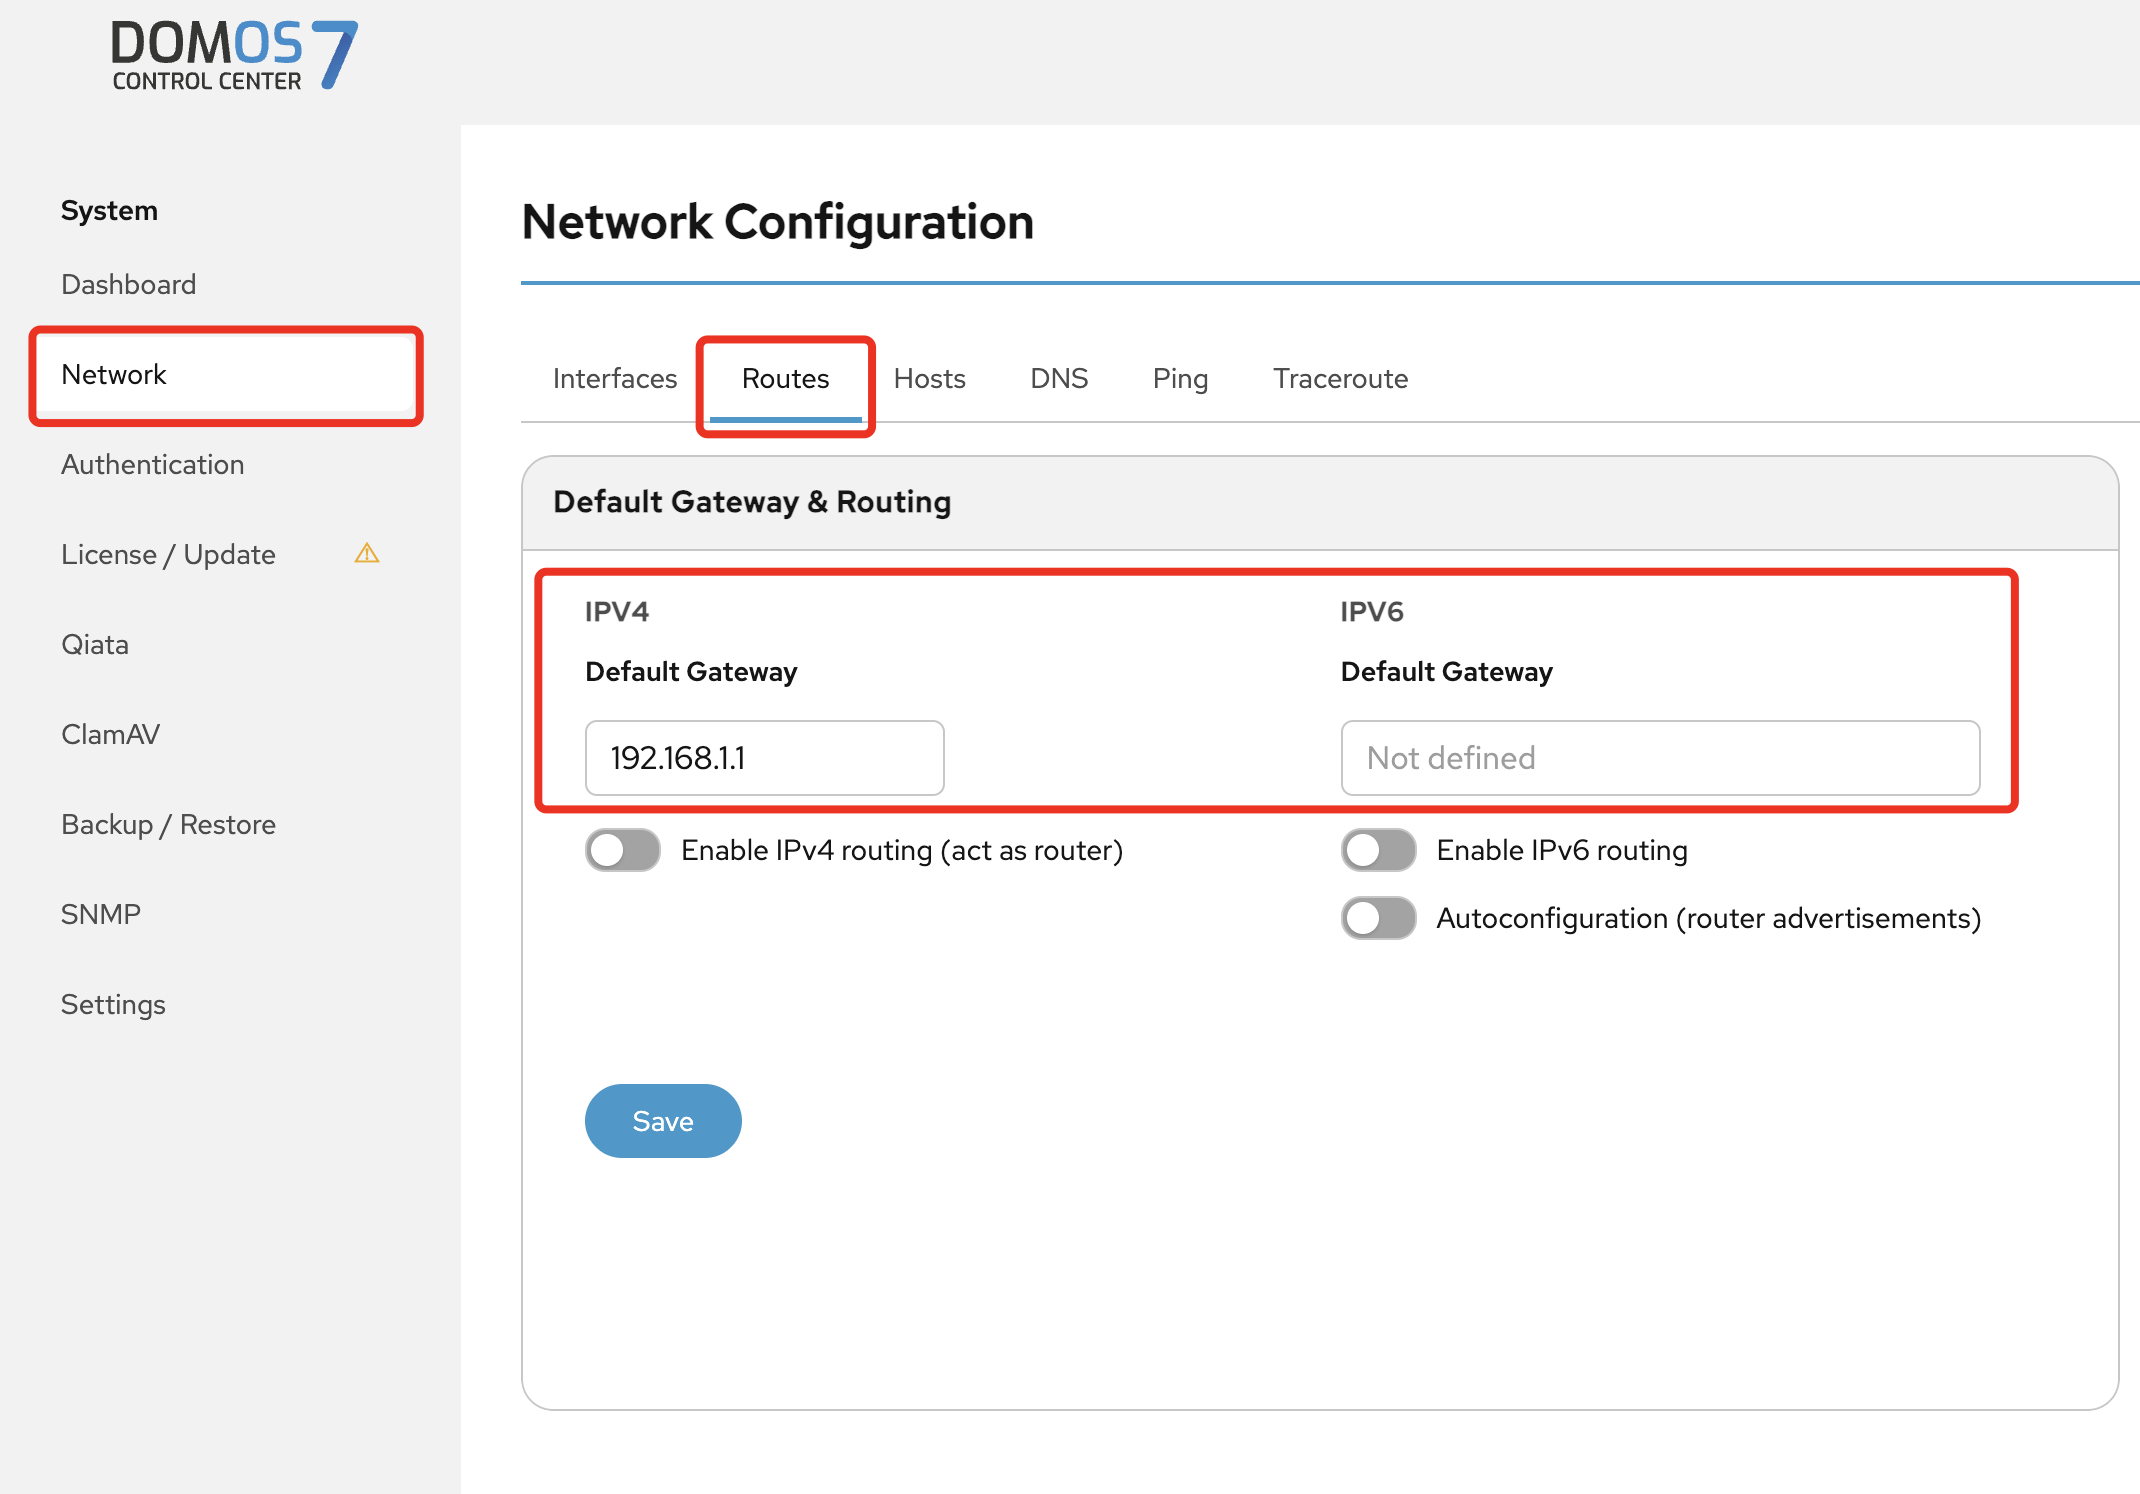
- Select "Network" → "Routes" in the navigation bar.
- Add (or change) the Default Gateway
- Click on Save
A default gateway is required for proper operation of the Qiata system.
Configure DNS Server
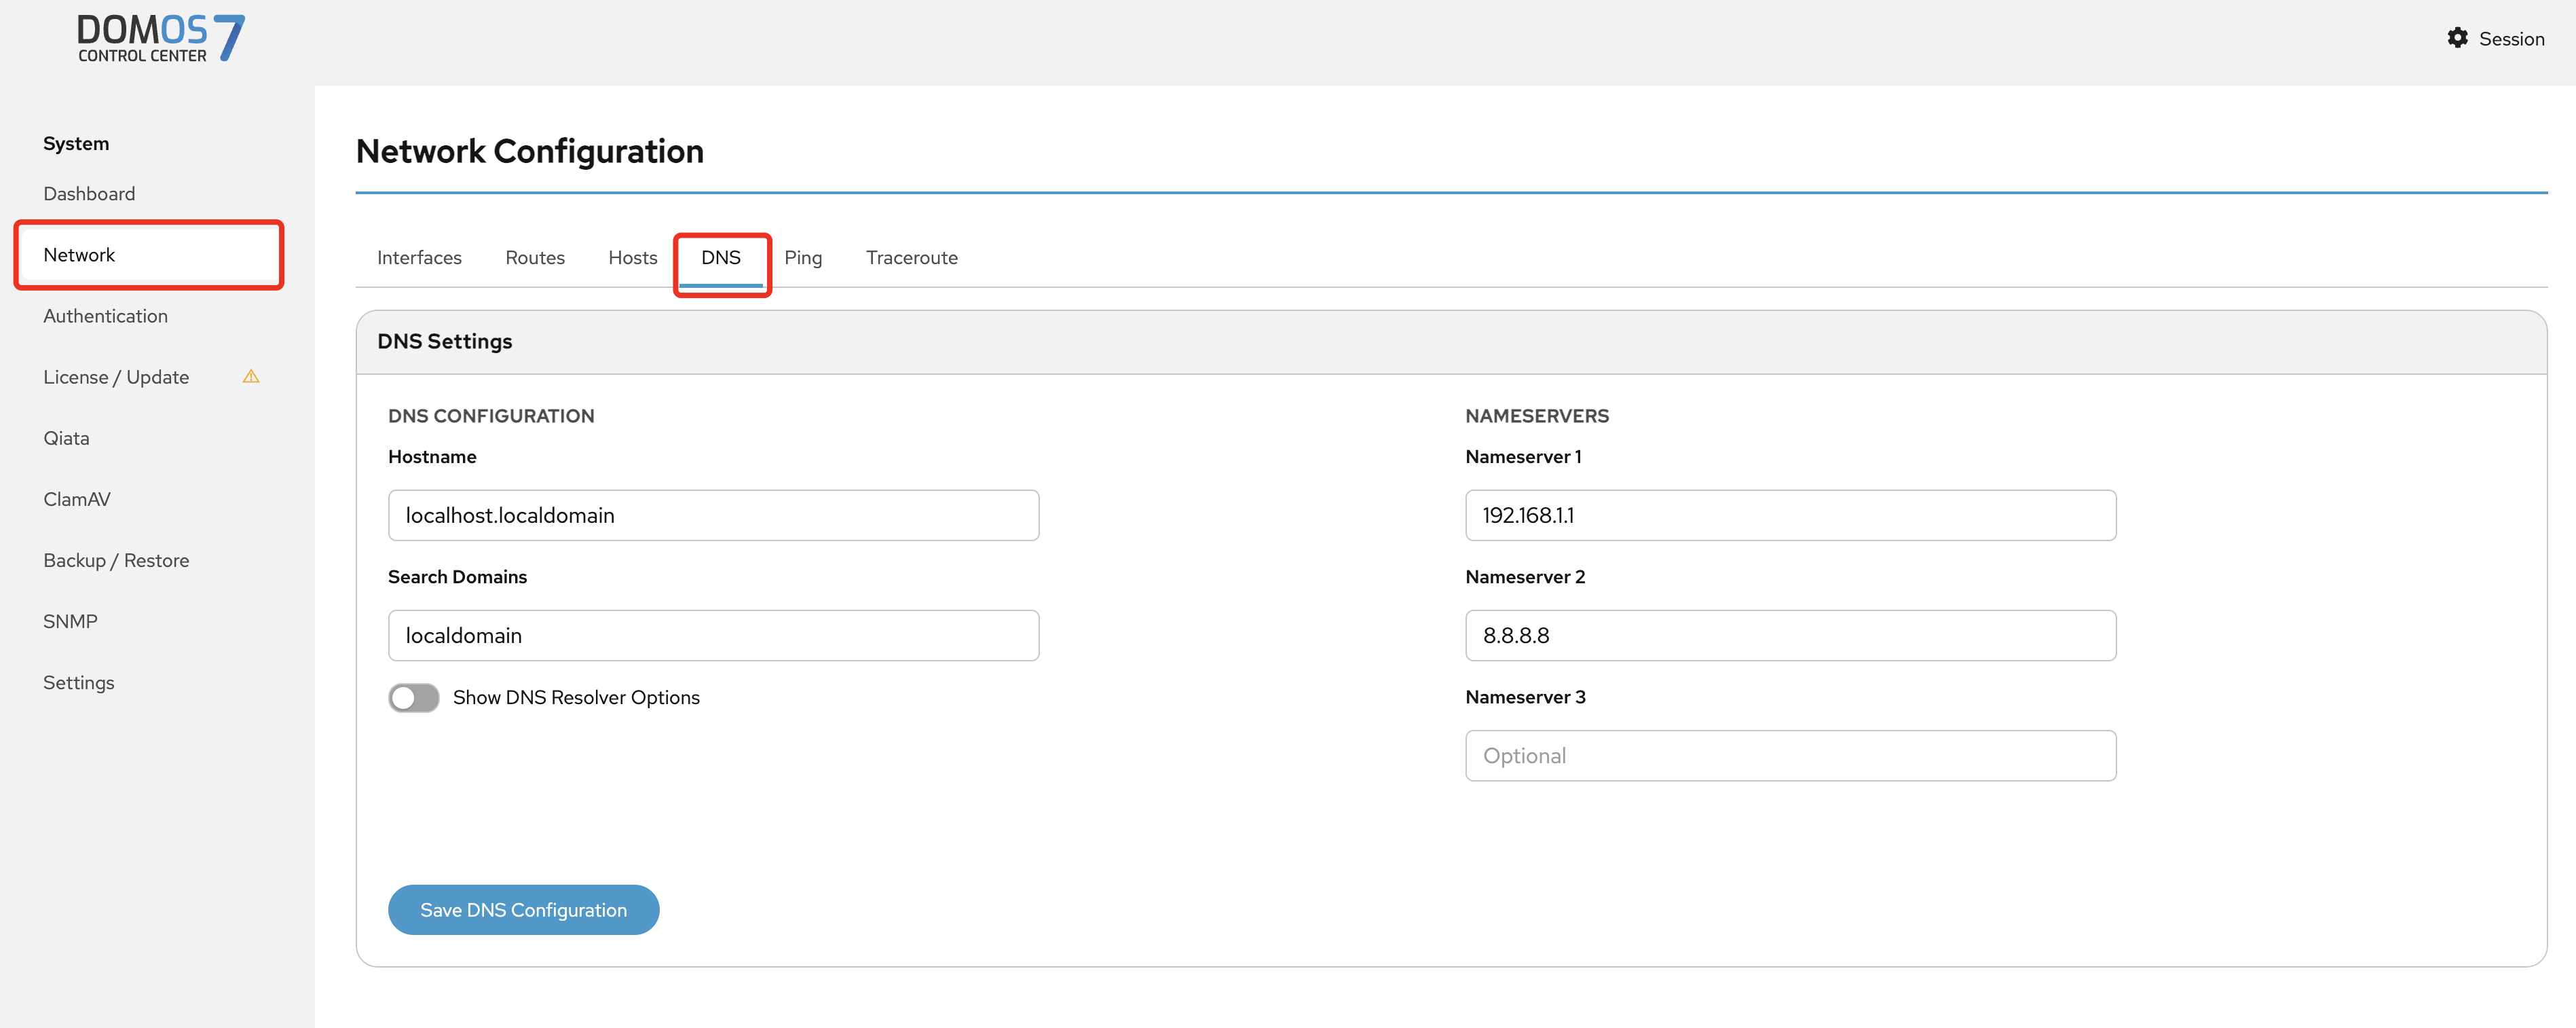
- Configure DNS server under "Network" → "DNS". [OPTIONAL]
Click on the "Activate Settings" button at the top to activate the current settings.
Applying the settings may take a few minutes. Please do not make any changes during this time and keep your browser open.

Configure Qiata
Technical Configuration (ftadmin)
Open your browser and navigate to the following address:
https://IP-OF-YOUR-APPLIANCE/sc
A login page will be displayed.
Since no SSL certificate signed by a trusted certificate authority has been installed yet, you must manually accept the default certificate before accessing the Qiata WebUI.
Log in using the ftadmin account:
Username: ftadmin
Password: ftadmin
- Change the password during the first login
Mail/SMTP Relay Configuration
-
Go to "Organisation" → "Mail" and configure the following:
- Modern Authentication via Microsoft Office 365. Here is how you set up Modern Authentication in DOMOS.
- SMTP relay server
- Port
- Username [OPTIONAL]
- Password [OPTIONAL]
- Name and email address of the default sender
-
Use the "SMTP Test" button to test your configuration
For the remainder of the installation process, the SMTP configuration must work correctly. The following users will already receive their access credentials by email.

Import License
If you are using a subscription license, you can skip these steps as the license will be installed automatically.
Go to the "License" tab and import the license file you received from us or your reseller. The file extension must be .xml.
Choose the file from your system and click on "Upload". After successfully importing your license, you can verify your enabled features and your software subscription.
To ensure proper operation of Qiata, the values Well Formed, Signed, and Applicable must all be set to Yes.

Configure Properties
Now go to "Properties" and configure the basic settings for your Qiata system.
- Set the "Company FQDN" (for example
demo.secudos.com) - Choose a "Default Language"
- Set an email address for the Primary Company Administrator (the PCA will receive the credentials by email)
- All other settings are optional and can be adjusted as needed
- Click on "Update"
The configured PCA will receive an email containing the login credentials.
From there, you can start creating new groups, users, and additional configurations. For advanced configuration and feature details, refer to the dedicated Qiata documentation.